2. Installing Robin Cloud Native Storage (CNS)
In this section, we will cover the pre-requisites for installing Robin CNS, accessing the necessary software and installing Robin CNS on various Kubernetes distributions/versions.
2.1. Prerequisites
Detailed below are the general prerequisites that must be met for all Robin CNS installations in any environment. Environment specific prerequisites can be found within their individual sections.
2.1.1. Minimum Resource Requirements
The minimum compute requirements in order to install Robin CNS on a Kubernetes cluster are listed below:
Each node must have at least 4 CPUs.
Each node must have at least 4GB of memory.
In order to determine the resource capacity on an existing Kubernetes cluster the following command can be used:
$ kubectl get nodes -o custom-columns=Name:.metadata.name,OSImage:.status.nodeInfo.osImage,KubeVersion:.status.nodeInfo.kubeProxyVersion,CPU:.status.capacity.cpu,Memory:.status.capacity.memory,providerID:.spec.providerID
2.1.2. Supported Kubernetes versions
Robin CNS can be installed on the following Kubernetes Distributions/versions.
Kubernetes |
Version Supported |
OpenShift |
4.5, 4.4 |
Google Anthos |
1.6, 1.7, 1.8 |
GKE |
1.16 through to 1.23 |
AKS |
1.16 through to 1.23 |
EKS |
1.16 through to 1.23 |
IKS |
1.16 through to 1.23 |
2.1.3. Supported OS for worker nodes
CentOS 7/8
Redhat 7/8
Ubuntu
Red Hat Enterprise Linux CoreOS
Container optimized OS (For GKE)
Note
Windows based OS are not supported by Robin CNS
2.1.4. Kernel dependency
Minimum supported kernel version for Redhat/CentOS based OS is 3.10.0-1062.xx.el7.x86_64. Run the command below to confirm that you are running the minimum supported kernel version:
$ uname -r
or run
yum updateto upgrade to the latest available kernel.Ensure that the
target_core_userandtcm_loopkernel modules are loaded on all nodes within the cluster before starting the installation process.
$ lsmod | egrep '^target_core_user|^tcm_loop'
target_core_user       35043  0
tcm_loop               21028  3
In order to load the modules on an Ubuntu based machine, run the following commands:
$ sudo apt-get update

$ sudo apt-get install linux-modules-extra-<kernel-version>

$ sudo depmod -a

$ sudo modprobe tcm_loop

$ lsmod | grep tcm
tcm_loop 28672 3
target_core_mod 360448 5 tcm_loop,target_core_user
Note
The kernel version can be determined from the output of the
uname -rcommand.
2.1.5. User permissions
Ensure the user installing Robin CNS is the Cluster Administrator within the Kubernetes cluster.
2.1.6. Port and access requirements
If you are installing Robin CNS on any platform, the following ports need to be accessible for the installation to succeed and for Robin to operate correctly:
Ports |
Description |
29442 - 29470 |
Robin services |
30000 - 32767 |
IKS specific ports* |
These ports are not mandatory for Robin CNS installations but are necessary when applications have to be made accessible outside of the IKS cluster.
Note
The above list of ports also apply to on-premises clusters. For the cloud platforms, when creating each rule to make the port accessible ensure that the protocol is TCP. In addition the cloud nodes should be able to communicate with one another on all ports via the IPv4 protocol.
Detailed below are the resources to manage ports and access requirements on various cloud platforms.
AWS
Ports can be made accessible via security groups on AWS. Details on how to create security groups can be found here.
Robin requires both the access key and secret key of a user to be passed during installation. Details on how to create/manage AWS credentials can be found here.
GCP
Ports can be made accessible via firewall rules on GCP. Details on how to create appropriate firewall rules can be found here.
Instances on which Robin will be installed need to have full access to cloud APIs. This can be set during instance creation.
Azure
Ports can be made accessible via network security groups on Azure. Details on how to create network groups can be found here.
IKS
2.1.7. Supported Volumes Types
The following are the supported volume types:
GCP: pd-ssd, pd-standard
AWS: gp2, gp3, io1, io2, st1
Google Anthos : independent-persistent
IBM cloud Platform : IBM include general-purpose (3iops-tier), 5iops-tier, 10iops-tier, custom
2.1.8. Storage requirements
The disks available for use by Robin CNS should meeting the following requirements:
A minimum of 25 GB of disk size is required for Robin CNS usage
Should not have any filesystem
Should not have any partitions created on the disk. If the partitions should be used for robin storage, there are manual steps involved to make this work.
Robin recommends having direct access to the storage disks without RAID controller in between. If RAID is to be used and caching is enabled at RAID controller level, then cache should be battery backed. This is to guarantee data consistency when power goes off. Overall, Robin does not recommend using RAID configuration and is discussed in more detail at here.
Note
Within the cluster, there needs to be at least one disk available for use by Robin CNS.
2.1.9. Networking requirements
By default the Robin CNS installer assumes that nodes within the Kubernetes cluster are DNS resolvable. If this is not the case the --update-coredns installer option must be used when installing the product in order for the installation to succeed.
2.1.10. Downloading Robin CNS Software
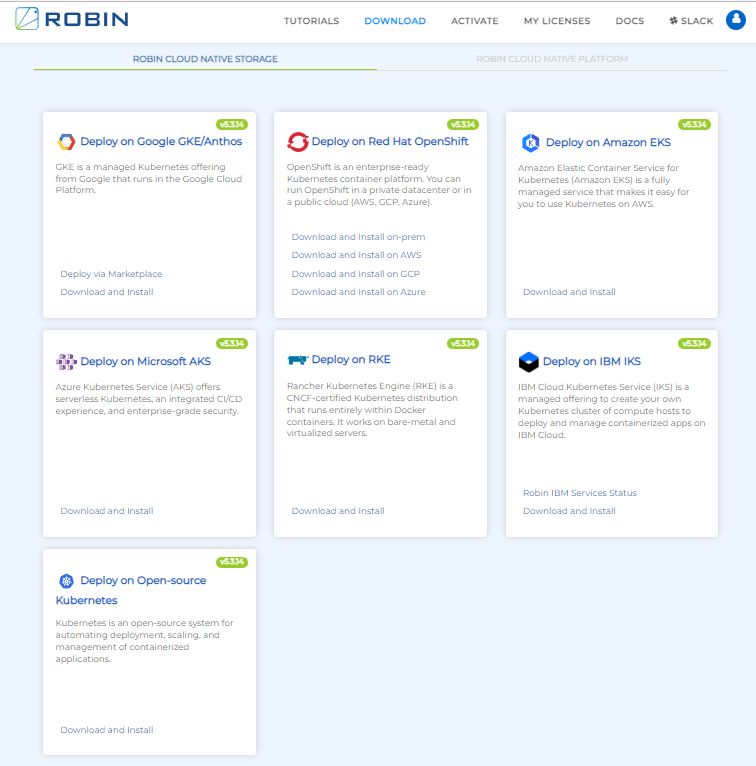
Depending on the Kubernetes distribution there could be more than one way to install Robin. Please visit the following link to see all the install options available to your specific setup. In addition if the Robin installer is used, it will automatically determine the Kubernetes distribution available on the target cluster.
Note
You have to first register an account before you can access the download link for your environment.
2.2. Install on Google Anthos
Anthos is a managed platform from Google that allows for the unification of multiple environments across on-premises, edge, and in multiple public clouds with a Google Cloud-backed control plane. Robin Cloud Native Storage is available as an offering to bring enterprise grade Storage and Data Management capabilities to run Stateful applications on Anthos. You can download Robin CNS software and install using a shipped installation script or install it manually via the CLI. In this section we will cover both.
Note
You can install Robin CNS on Anthos installed on a bare metal system. The same prerequisites and steps applicable for installing Robin CNS on Cloud are applicable for Anthos installed on bare metal setup.
2.2.1. Prerequisites
All general prequisites detailed here must be met.
The ports detailed here need to be accessible for the installation to succeed and for Robin to operate correctly.
Ensure the user installing Robin CNS is the Cluster Administrator within the Kubernetes cluster. For Anthos installations, run following commands to add a user as a Cluster Administrator:
$ account=$(gcloud info | grep Account  | awk -F'[\\[\\]]' '{print $2}')

$ kubectl create clusterrolebinding robin-cluster-admin-binding --clusterrole=cluster-admin --user=$account
2.2.2. Install using Robin Installer
Follow the steps below to download and install Robin CNS for Google Anthos. Please proceed to Step 4 if you already have the installer downloaded.
Visit the following link and register an account.
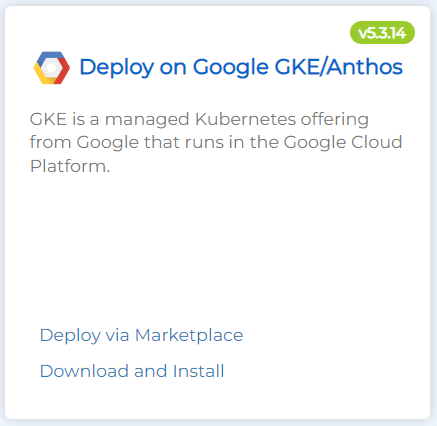
From the Downloads page click Download and Install on the Deploy on Google GKE/Anthos tab.
Copy either the
wgetorcurlcommand and run it on your command line to download the installation tarfile. An example is shown below:$ wget "http://get.robin.io/download/storage?id=<USERID>&type=gke" -O robin-install.tar
Once the file is downloaded, run the below command to untar the contents into a new directory.
$ mkdir -p ./robin && tar -xf robin-install.tar -C ./robin
Move into the newly created directory, such that it is now your current working directory, and install Robin via the following commands:
$ cd robin
$ ./install-robin.sh -y
Validating Kubernetes cluster......Done

Confirm that ports 29442-29470 are open between kubernetes nodes
Make sure the cluster meets prerequisites mentioned at https://docs.robin.io/latest/install.html#minimum-node-requirements
Type yes to confirm that cluster meets the prerequisites:
yes
Validating kubernetes cluster permissions......Done
Validating robin cluster yaml......Done
Installing Robin operator...........Done
Installing Robin cluster............secret/cloud-cred-secret created
Done
Setting up robin client............Done

Activate robin license............Required

       $ robin license activate <USERID>

       Note: You can get your User ID after registering on https://get.robin.io. Above command will only work if the host on which the
             ROBIN client is running on has an internet connection. If this is not the case please retrieve the license key by using the
             below link and apply it using the command 'robin license apply <key>'.

             https://get.robin.io/activate?clusterid=

      For logging into robin cluster,
      Default username: admin
      Default password: Robin123
Note
The above command shows only the required parameters for installations. In order to customize the installation, review the various installation options detailed here.
This concludes the install. Continue here to verify the installation and set up the product.
2.2.3. Install via CLI
Follow the steps below to manually install Robin CNS for Google Anthos using CLI commands.
Clone the
robin-storagerepository using the command shown below:$ git clone https://github.com/RobinSystems/robin-storage-gke-marketplace.git Cloning into 'robin-storage-gke-marketplace'... remote: Enumerating objects: 142, done. remote: Counting objects: 100% (12/12), done. remote: Compressing objects: 100% (11/11), done. remote: Total 142 (delta 2), reused 9 (delta 1), pack-reused 130 Receiving objects: 100% (142/142), 84.59 KiB | 0 bytes/s, done. Resolving deltas: 100% (64/64), done.
Move into the newly created directory, such that it is now your current working directory, and create the application CRD within the Anthos cluster if it is not already available with the following command:
$ cd robin-storage-gke-marketplace/
$ kubectl apply -f app-crd.yaml
customresourcedefinition.apiextensions.k8s.io/applications.app.k8s.io configured
Create the
robinionamespace if it is not present using the below command:$ export NAMESPACE=robinio $ kubectl create ns ${NAMESPACE} namespace/robinio createdVisit the following link and download a license key from the Deploy via Command Line tab.
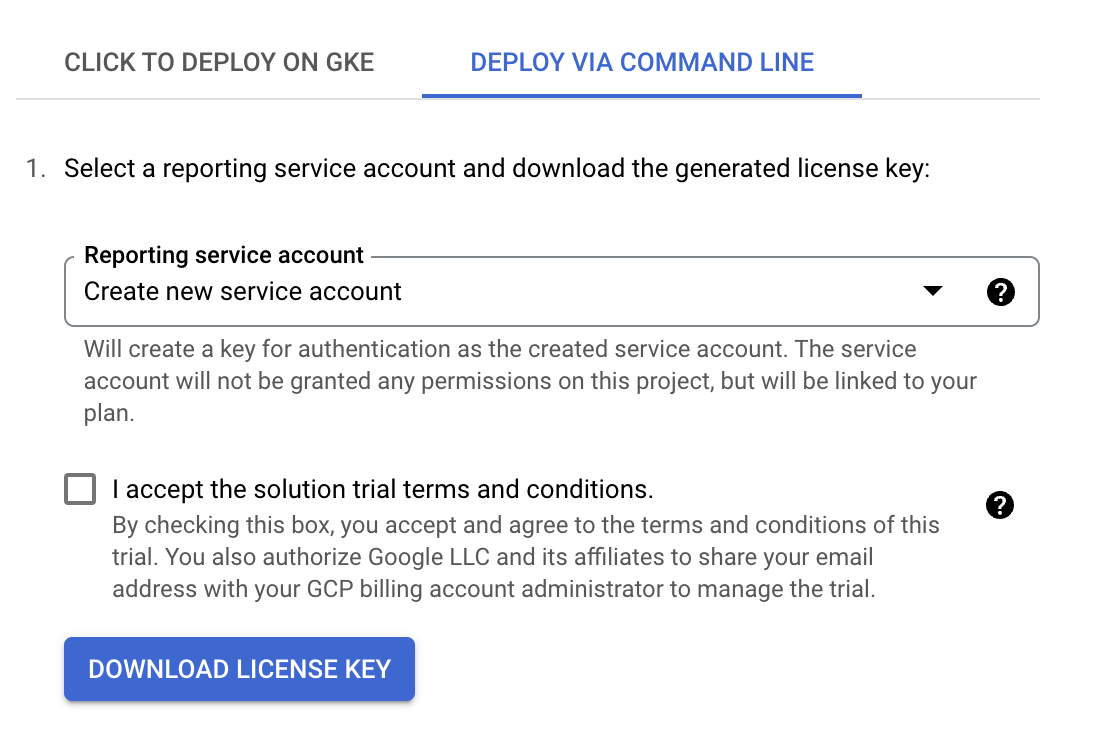
Once the license key is downloaded, run the below command to apply it.
$  kubectl apply -f license.yaml -n robinio
secret/robin-cns-license-335206 created

$ export REPORTING_SECRET="robin-cns-license-335206"
Note
The value for the
REPORTING_SECRETenvironment variable should be the name of the Kubernetes secret created after the license YAML is applied.Run the following commands in order to setup the appropriate variables, apply the necessary YAML files and install Robin:
$ export APP_INSTANCE_NAME=robin
$ export HOST_TYPE=physical
$ export TAG=5.3.10
$ export IMAGE_ROBIN_OPERATOR="gcr.io/robinio-public/robin-storage/robin-operator:${TAG}"
$ export IMAGE_ROBIN="gcr.io/robinio-public/robin-storage:${TAG}"
$ export IMAGE_UBBAGENT="gcr.io/robinio-public/robin-storage/ubbagent:${TAG}"
$ export IMAGE_ROBIN_DEPLOYER="gcr.io/robinio-public/robin-storage/deployer:${TAG}"
$ export IMAGE_CRJOB="gcr.io/robinio-public/robin-storage/crjob:${TAG}"
$ export CLUSTER_REQUIREMENTS="yes"
$ export STORAGE_DISKS=""
$ export ROBINDS_DIR="/home/robinds"
$ export ROBINLOG_DIR="/home/robinds"
$ export ROBINCRASH_DIR="/home/robinds"
$ export UPDATE_COREDNS="0"
$ export DNS_SERVICE="kube-system/kube-dns"

$ awk 'FNR==1 {print "---"}{print}' sa.yaml.template | envsubst '$APP_INSTANCE_NAME $NAMESPACE $IMAGE_ROBIN_OPERATOR $IMAGE_ROBIN $SERVICE_ACCOUNT $IMAGE_PROVISIONER_V04 $IMAGE_PROVISIONER_V10 $REPORTING_SECRET $IMAGE_UBBAGENT $IMAGE_ROBIN_DEPLOYER $CLUSTER_REQUIREMENTS $STORAGE_DISKS $HOST_TYPE $IMAGE_CRJOB $UPDATE_COREDNS $DNS_SERVICE' > "sa_manifest.yaml"

$ kubectl apply -f "sa_manifest.yaml" --namespace "${NAMESPACE}"
serviceaccount/robin-deployer-sa created
clusterrole.rbac.authorization.k8s.io/robin:robinio:deployer-cr0 created
clusterrolebinding.rbac.authorization.k8s.io/robin:robinio:deployer-crb0 created

$ export SERVICE_ACCOUNT="${APP_INSTANCE_NAME}-deployer-sa"

$ awk 'FNR==1 {print "---"}{print}' manifest/*   | envsubst '$APP_INSTANCE_NAME $NAMESPACE $IMAGE_ROBIN_OPERATOR $IMAGE_ROBIN $SERVICE_ACCOUNT $IMAGE_PROVISIONER_V04 $IMAGE_PROVISIONER_V10 $REPORTING_SECRET $IMAGE_UBBAGENT $IMAGE_ROBIN_DEPLOYER $CLUSTER_REQUIREMENTS $STORAGE_DISKS $HOST_TYPE $ROBINDS_DIR $ROBINLOG_DIR $ROBINCRASH_DIR $IMAGE_CRJOB $UPDATE_COREDNS $DNS_SERVICE' > "${APP_INSTANCE_NAME}_manifest.yaml"

$ kubectl apply -f "${APP_INSTANCE_NAME}_manifest.yaml" --namespace "${NAMESPACE}"
application.app.k8s.io/robin created
customresourcedefinition.apiextensions.k8s.io/robinclusters.manage.robin.io created
configmap/robin-cr created
deployment.apps/robin-operator created
job.batch/robin-cr created
deployment.apps/robin-monitor created
This concludes the install. Continue here to verify the installation and set up the product.
2.3. Install on Google GKE
GKE is a managed Kubernetes offering from Google that runs in the Google Cloud Platform. Robin Cloud Native Storage is available as a marketplace offering to bring enterprise grade Storage and Data Management capabilities to run Stateful applications on GKE. You can also download Robin CNS software and install using the shipped installation script or manually via the CLI. In this section we will cover all these options.
2.3.1. Prerequisites
All general prequisites detailed here must be met.
The ports detailed here need to be accessible for the installation to succeed and for Robin to operate correctly.
The kubernetes auto-upgrade option must be disabled at the time of install or immediately after a successful installation. Failure to do so could lead to future disruptions.
Ensure the user installing Robin CNS is the Cluster Administrator within the Kubernetes cluster. For GKE installations, run following commands to add a user as a Cluster Administrator:
$ account=$(gcloud info | grep Account  | awk -F'[\\[\\]]' '{print $2}')

$ kubectl create clusterrolebinding robin-cluster-admin-binding --clusterrole=cluster-admin --user=$account
Note
For GKE installations, Robin needs nodes with Ubuntu image and cluster with
Compute Engine: Read WriteandStorage: FullAPI being enabled. Compute Engine API access is required to make sure disks are always accessible and easy way to provision disks within ROBIN. Storage API access is required for backing up applications in GCS. You can select theAccess scopeas one of the following while creating GKE cluster.Set access for each API and select individual permissions
Allow full access to all Cloud APIs
2.3.2. Install via Google Marketplace
Visit the marketplace
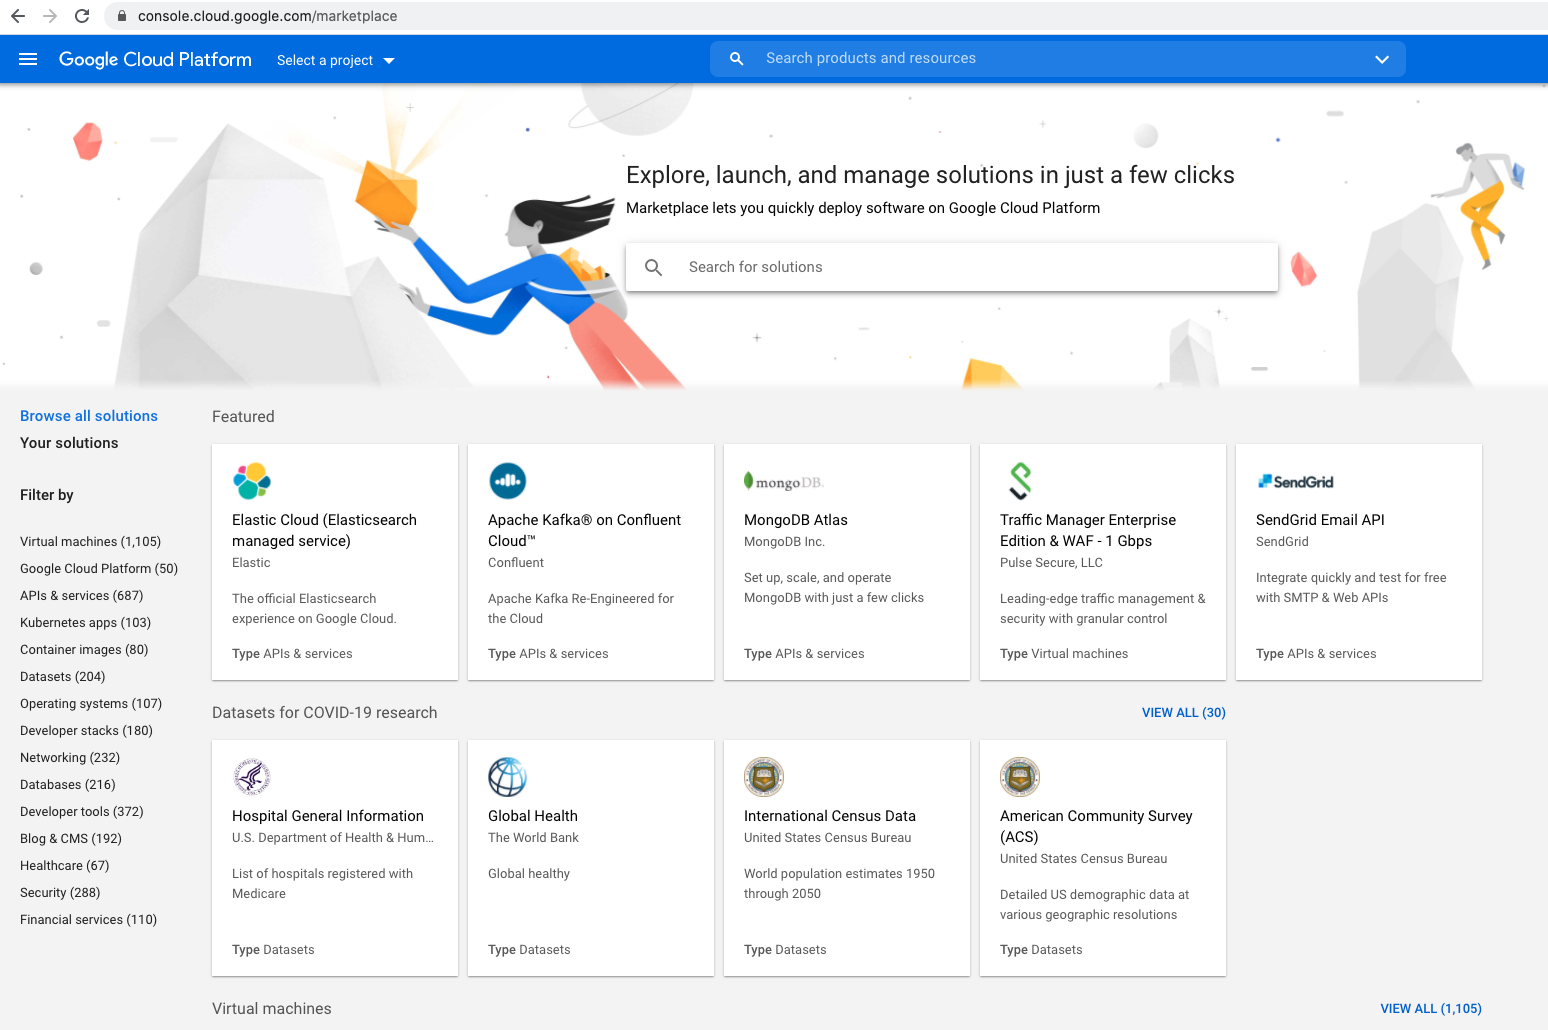
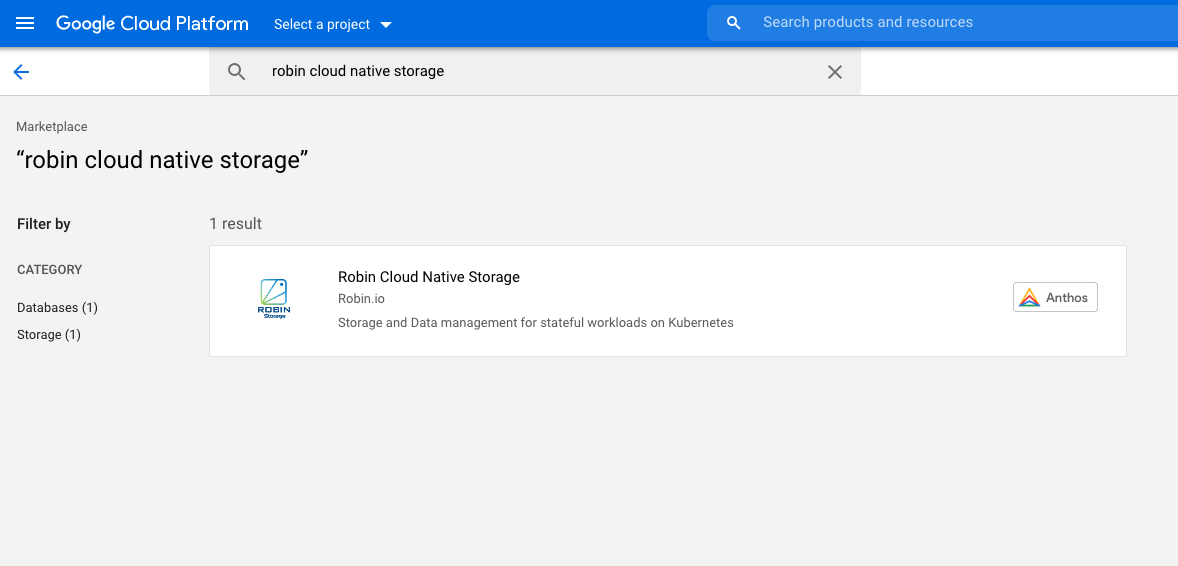
Search for
robin cloud native storageas shown below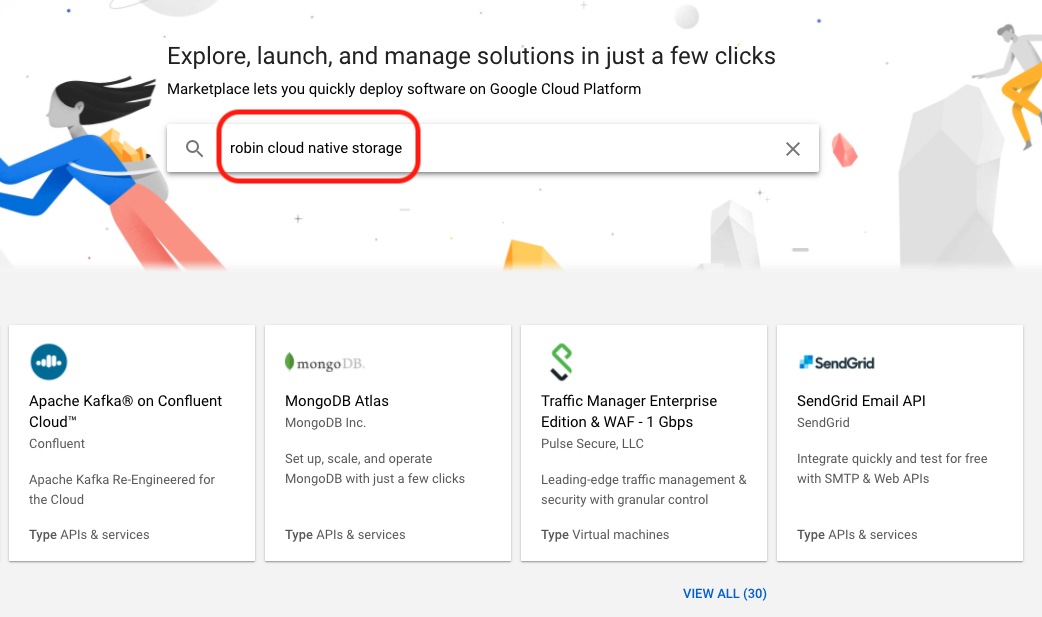
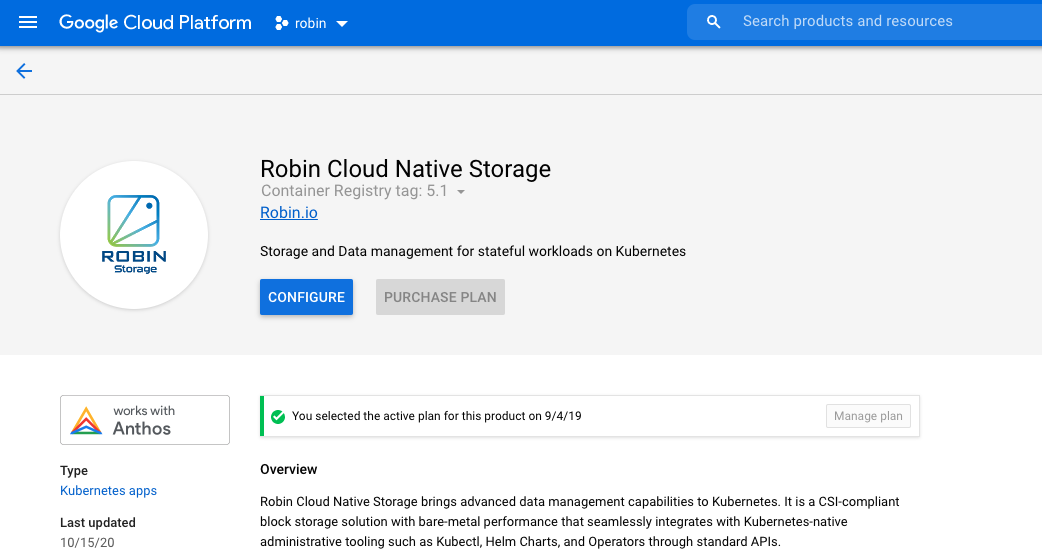
Select Robin Cloud Native Storage
Click on Configure
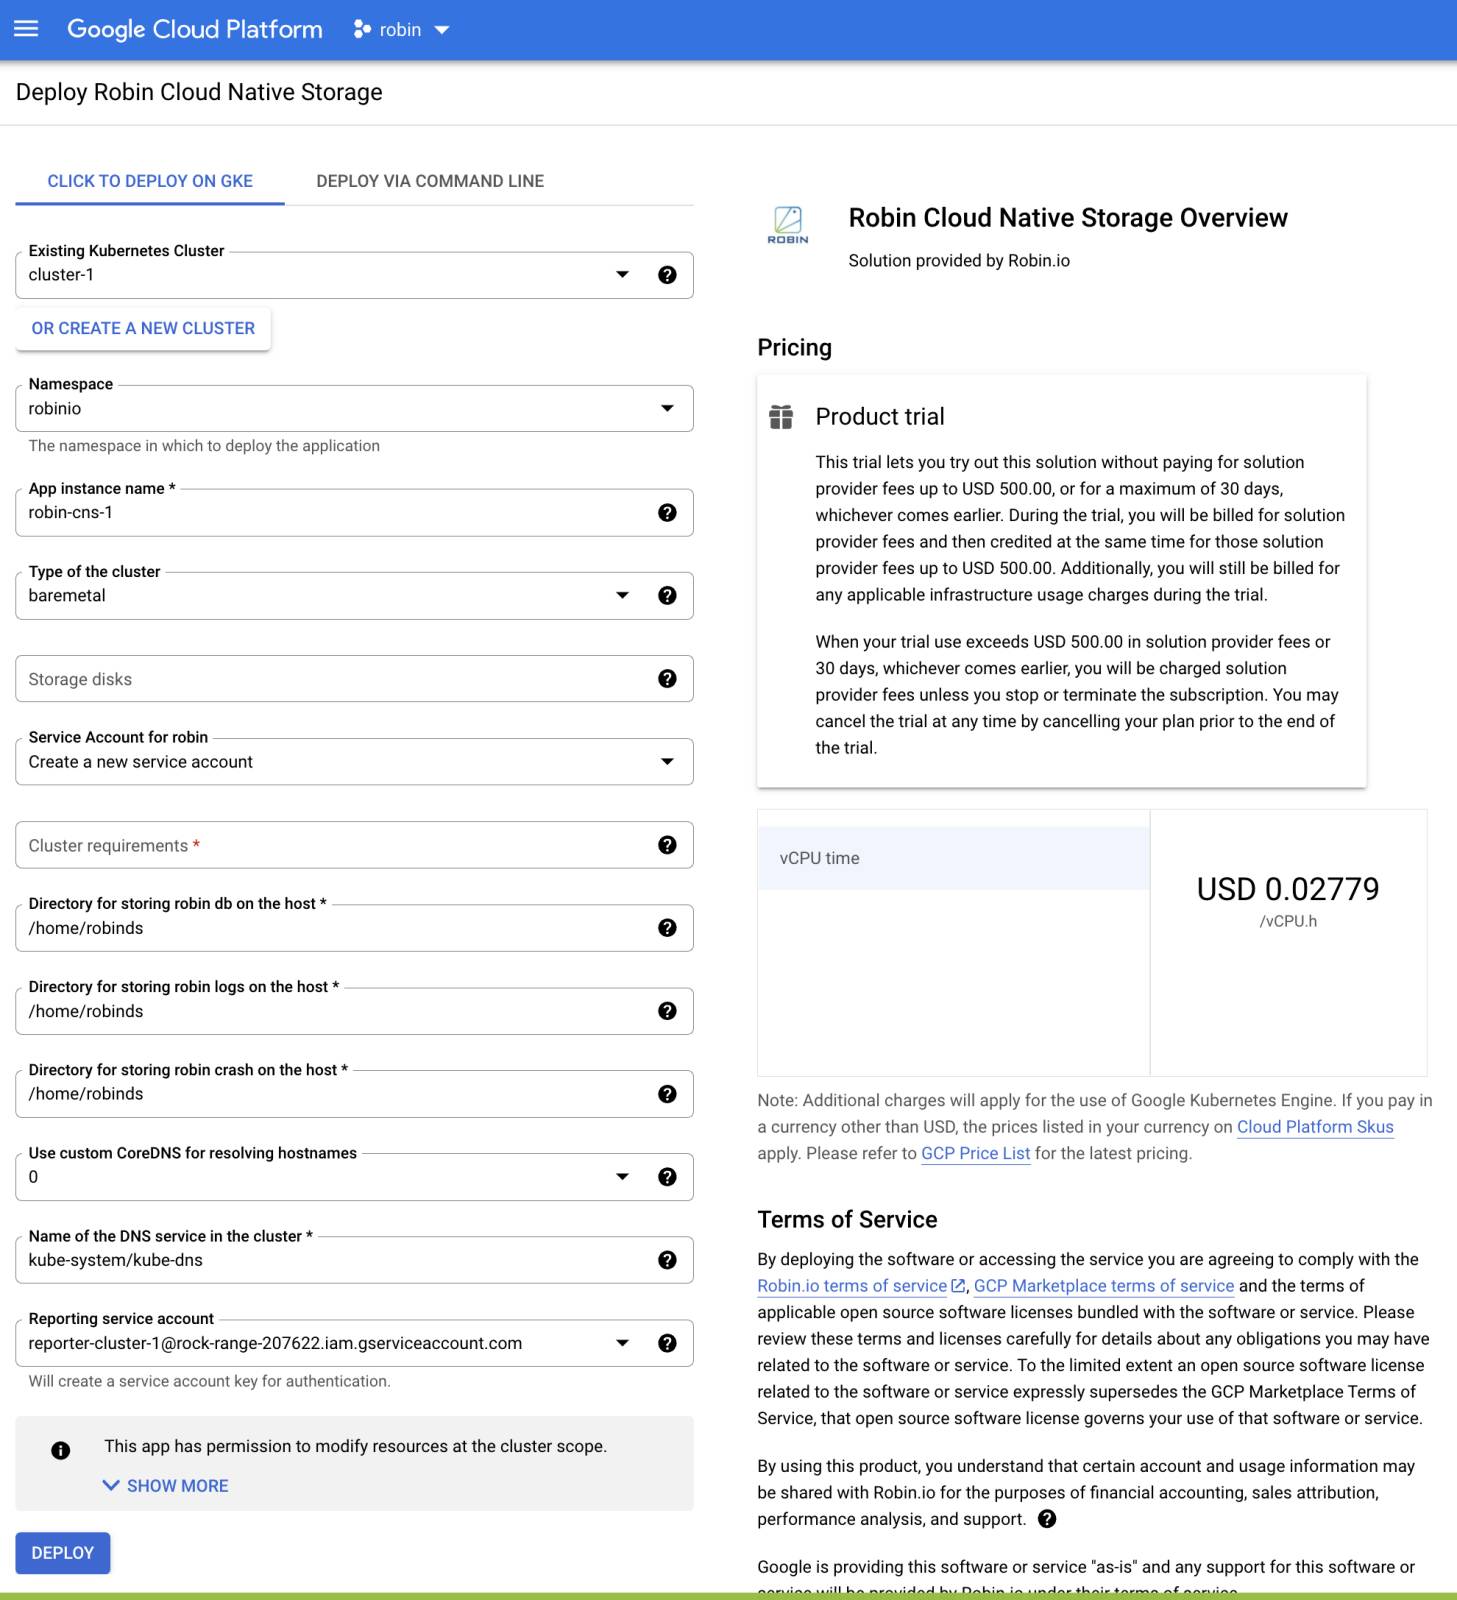
In the configuration page, select an existing GKE cluster or create a new cluster to deploy Robin CNS, Fill out each option appropriately and type ‘YES’ for Cluster requirements and click Deploy
You will then be taken to the Application details page. You should see a similar output. Wait until all the components turn to OK or Running status.
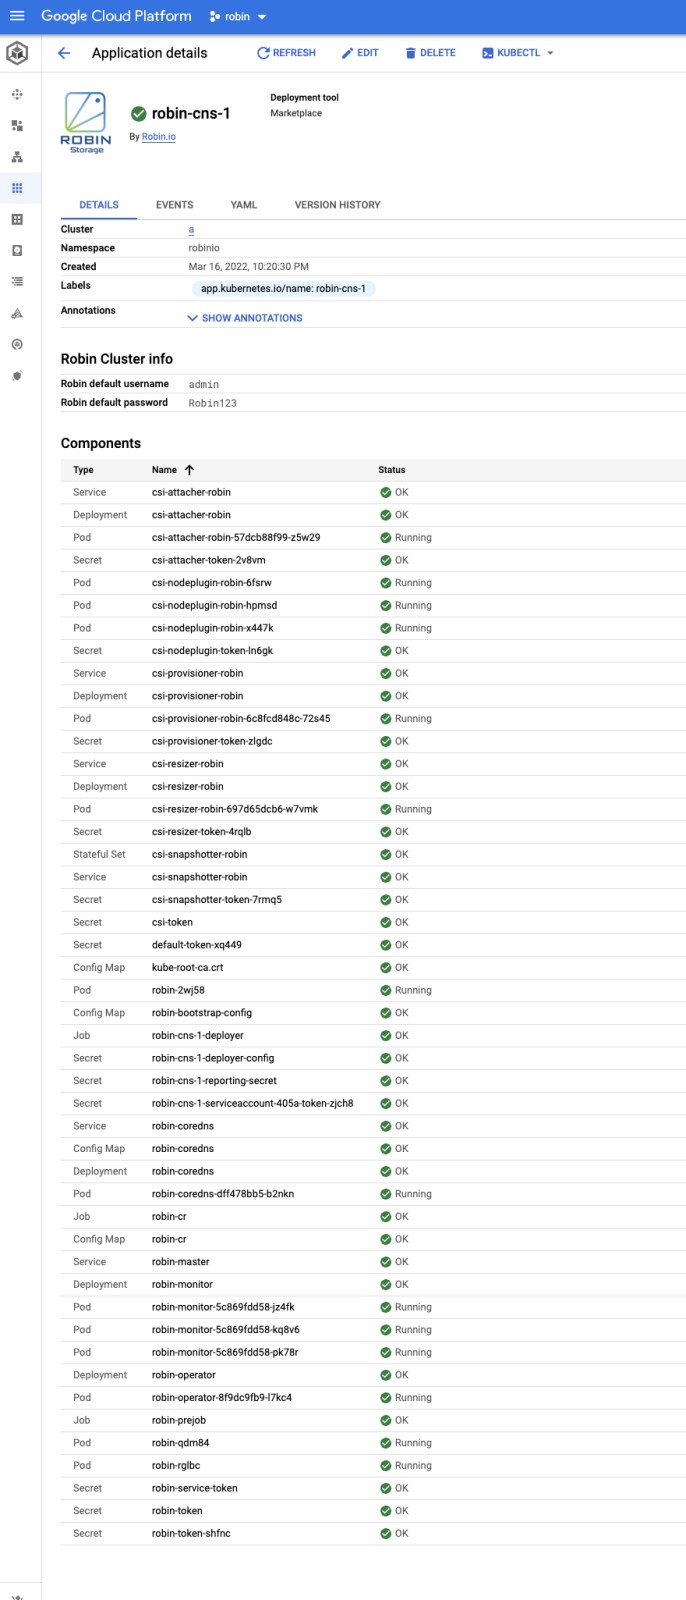
After installing Robin CNS, verify the installation and set up your cluster.
Note
Billing for Robin CNS when deploying on Google Marketplace is done on an hourly basis and is dependant on the total number of CPUs in the cluster. The exact formula to calculate the total cost is as follows: #TotalCPUs x #Hours x $ per CPU per hour. In addition, to find the number of CPUs on a single node the cat /proc/cpuinfo command can be used.
2.3.3. Install using Robin Installer
Follow the steps below to download and install Robin CNS for GKE. Please proceed to Step 4 if you already have the installer downloaded.
Visit the following link and register an account.
From the Downloads page click Download and Install on the Deploy on Google GKE/Anthos tab.
Copy either the
wgetorcurlcommand and run it on your command line to download the installation tarfile. An example is shown below:$ wget "http://get.robin.io/download/storage?id=<USERID>&type=gke" -O robin-install.tar
Once the file is downloaded, run the below command to untar the contents into a new directory.
$ mkdir -p ./robin && tar -xf robin-install.tar -C ./robin
Move into the newly created directory, such that it is now your current working directory, and install Robin via the following commands:
$ cd robin
$ ./install-robin.sh --cluster-name=mg-cluster --zone-name=us-central1 -y
Validating Kubernetes cluster......Done

Confirm that ports 29442-29470 are open between kubernetes nodes
Make sure the cluster meets prerequisites mentioned at https://docs.robin.io/latest/install.html#minimum-node-requirements
Type yes to confirm that cluster meets the prerequisites:
yes
Validating kubernetes cluster permissions......Done
Validating robin cluster yaml......Done
Installing Robin operator...........Done
Installing Robin cluster............secret/cloud-cred-secret created
Done
Setting up robin client............Done

Activate robin license............Required

       $ robin license activate <USERID>

       Note: You can get your User ID after registering on https://get.robin.io. Above command will only work if the host on which the
             ROBIN client is running on has an internet connection. If this is not the case please retrieve the license key by using the
             below link and apply it using the command 'robin license apply <key>'.

             https://get.robin.io/activate?clusterid=

      For logging into robin cluster,
      Default username: admin
      Default password: Robin123
Note
The above command shows only the required parameters for installations. In order to customize the installation, review the various installation options detailed here.
This concludes the install. Continue here to verify the installation and set up the product.
2.3.4. Install via CLI
Follow the steps below to manually install Robin CNS for GKE using CLI commands.
Clone the
robin-storagerepository using the command shown below:$ git clone https://github.com/RobinSystems/robin-storage-gke-marketplace.git Cloning into 'robin-storage-gke-marketplace'... remote: Enumerating objects: 142, done. remote: Counting objects: 100% (12/12), done. remote: Compressing objects: 100% (11/11), done. remote: Total 142 (delta 2), reused 9 (delta 1), pack-reused 130 Receiving objects: 100% (142/142), 84.59 KiB | 0 bytes/s, done. Resolving deltas: 100% (64/64), done.
Move into the newly created directory, such that it is now your current working directory, and create the application CRD within the Anthos cluster if it is not already available with the following command:
$ cd robin-storage-gke-marketplace/
$ kubectl apply -f app-crd.yaml
customresourcedefinition.apiextensions.k8s.io/applications.app.k8s.io configured
Create the
robinionamespace if it is not present using the below command:$ export NAMESPACE=robinio $ kubectl create ns ${NAMESPACE} namespace/robinio createdVisit the following link and download a license key from the Deploy via Command Line tab.
Once the license key is downloaded, run the below command to apply it.
$  kubectl apply -f license.yaml -n robinio
secret/robin-cns-license-335206 created

$ export REPORTING_SECRET="robin-cns-license-335206"
Note
The value for the
REPORTING_SECRETenvironment variable should be the name of the Kubernetes secret created after the license YAML is applied.Run the following commands in order to setup the appropriate variables, apply the necessary YAML files and install Robin:
$ export APP_INSTANCE_NAME=robin
$ export HOST_TYPE=gcp
$ export TAG=5.3.10
$ export IMAGE_ROBIN_OPERATOR="gcr.io/robinio-public/robin-storage/robin-operator:${TAG}"
$ export IMAGE_ROBIN="gcr.io/robinio-public/robin-storage:${TAG}"
$ export IMAGE_UBBAGENT="gcr.io/robinio-public/robin-storage/ubbagent:${TAG}"
$ export IMAGE_ROBIN_DEPLOYER="gcr.io/robinio-public/robin-storage/deployer:${TAG}"
$ export IMAGE_CRJOB="gcr.io/robinio-public/robin-storage/crjob:${TAG}"
$ export CLUSTER_REQUIREMENTS="yes"
$ export STORAGE_DISKS=""
$ export ROBINDS_DIR="/home/robinds"
$ export ROBINLOG_DIR="/home/robinds"
$ export ROBINCRASH_DIR="/home/robinds"
$ export UPDATE_COREDNS="0"
$ export DNS_SERVICE="kube-system/kube-dns"

$ awk 'FNR==1 {print "---"}{print}' sa.yaml.template | envsubst '$APP_INSTANCE_NAME $NAMESPACE $IMAGE_ROBIN_OPERATOR $IMAGE_ROBIN $SERVICE_ACCOUNT $IMAGE_PROVISIONER_V04 $IMAGE_PROVISIONER_V10 $REPORTING_SECRET $IMAGE_UBBAGENT $IMAGE_ROBIN_DEPLOYER $CLUSTER_REQUIREMENTS $STORAGE_DISKS $HOST_TYPE $IMAGE_CRJOB $UPDATE_COREDNS $DNS_SERVICE' > "sa_manifest.yaml"

$ kubectl apply -f "sa_manifest.yaml" --namespace "${NAMESPACE}"
serviceaccount/robin-deployer-sa created
clusterrole.rbac.authorization.k8s.io/robin:robinio:deployer-cr0 created
clusterrolebinding.rbac.authorization.k8s.io/robin:robinio:deployer-crb0 created

$ export SERVICE_ACCOUNT="${APP_INSTANCE_NAME}-deployer-sa"

$ awk 'FNR==1 {print "---"}{print}' manifest/*   | envsubst '$APP_INSTANCE_NAME $NAMESPACE $IMAGE_ROBIN_OPERATOR $IMAGE_ROBIN $SERVICE_ACCOUNT $IMAGE_PROVISIONER_V04 $IMAGE_PROVISIONER_V10 $REPORTING_SECRET $IMAGE_UBBAGENT $IMAGE_ROBIN_DEPLOYER $CLUSTER_REQUIREMENTS $STORAGE_DISKS $HOST_TYPE $ROBINDS_DIR $ROBINLOG_DIR $ROBINCRASH_DIR $IMAGE_CRJOB $UPDATE_COREDNS $DNS_SERVICE' > "${APP_INSTANCE_NAME}_manifest.yaml"

$ kubectl apply -f "${APP_INSTANCE_NAME}_manifest.yaml" --namespace "${NAMESPACE}"
application.app.k8s.io/robin created
customresourcedefinition.apiextensions.k8s.io/robinclusters.manage.robin.io created
configmap/robin-cr created
deployment.apps/robin-operator created
job.batch/robin-cr created
deployment.apps/robin-monitor created
This concludes the install. Continue here to verify the installation and set up the product.
2.4. Install on IKS
2.4.1. Prerequisites
The following prerequisites must be met to install Robin CNS without a Key Management Service (KMS) on IKS.
All general prerequisites detailed here must be met.
The ports detailed here need to be accessible for the installation to succeed and for Robin to operate correctly.
Currently only the VPC-Gen2 infrastructure type is supported.
If installing via the IBM Catalog the following additional prerequisites also need to be met:
Details pertaining to IBM Cloud login credentials and IBM Cloud API Key (to discover pre-existing Kubernetes clusters) must be known.
A target Kubernetes cluster installed within either Europe (Frankfurt) or North America (Dallas) regions.
Details pertaining to the ID of the appropriate IBM Key Protect instance and associated Key Protect API endpoint must be known if integration with IBM Key Protect is desired.
2.4.2. Install using Robin Installer
The following are the steps to download and install Robin CNS for IKS. Proceed to step 4 if you have already downloaded the Robin Installer.
Visit the following link and register an account.
On the Downloads page, click Download and Install on the IKS tab.
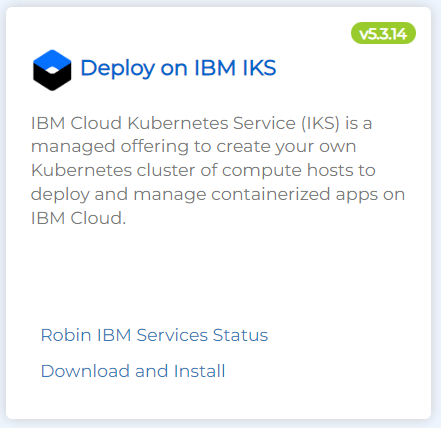
Copy either the
wgetorcurlcommand and run it on your command line to download the installation tar file. An example is shown below:$ wget "http://get.robin.io/download/storage?id=<USERID>&type=iks" -O robin-install.tar
Once the file is downloaded, run the below command to untar the contents into a new directory.
$ mkdir -p ./robin && tar -xf robin-install.tar -C ./robin
Move into the newly created directory, such that it is now your current working directory, and run the following commands to install Robin without a KMS:
$ cd robin
$ ./install-robin.sh --version=5.3.14-112
Validating Kubernetes cluster......Done
Make sure the cluster meets prerequisites mentioned at https://docs.robin.io/storage/latest/install.html#prerequisites
Type yes to confirm that cluster meets the prerequisites: yes
Enter IBM api key: XXXXXXXXXXXXXXXXXXXXXXXXXXXXXXXXXXXXXXXXXXXXXX
Validating kubernetes cluster permissions......Done
Validating robin cluster yaml......Done
Installing Robin operator...........Done
Installing Robin cluster............Done
Setting up robin client............Done

Activate robin license............Required

       $ robin license activate <USERID>

       Note: You can get your User ID after registering on https://get.robin.io. Above command will only work if the host on which the
             ROBIN client is running on has an internet connection. If this is not the case please retrieve the license key by using the
             below link and apply it using the command 'robin license apply <key>'.

             https://get.robin.io/activate?clusterid=

      For logging into robin cluster,
      Default username: admin
      Default password: Robin123
Note
The above command shows only the required parameters for installations. In order to customize the installation, review the various installation options detailed here.
This concludes the install. Continue here to verify the installation and set up the product.
2.4.3. Install using IBM Catalog
To install Robin CNS on IKS from IBM Catalog, complete the following steps:
Access the IBM cloud platform using your login credentials.
On the Catalog page, search for Robin and select the Cloud Native Storage and Data Service option.
Under the Create tab, first select the location the target IKS cluster resides.
Note
Currently only the Europe (Frankfurt) and North America (Dallas) locations are supported.
In the Select a pricing plan section, select the appropriate pricing plan for you. Both hourly ($0.42 USD per node per hour) or monthly ($275.00 USD per node per month) plans are available.
Complete the following steps in the Configure your resource section.
In the Service name field, type a name for the service. This name should be relevant to your setup for easy identification.
Select the resource group that should be used. By default, the Default resource group is selected.
In the Tags field, type appropriate tags for your service.
In the IBM Cloud API key field, type your API key. After you provide the IBM Cloud API key, the Kubernetes text box displays the list of available Kubernetes clusters.
In the Kubernetes (IKS) cluster name field, select the desired Kubernetes cluster from the list.
(Optional) In the KMS url field, enter the appropriate IBM Key Protect API endpoint.
(Optional) In the IBM id, field, enter the appropriate IBM Key Protect instance ID.
In the Network Access field select the appropriate option for your selected Kubernetes cluster. The Public option indicates that the Public Service Endpoint is enabled for the cluster. This external connectivity will only be used to manage IBM Cloud Block Storage via the APIs published here. On the other hand the Private option indicates an air-gapped Kubernetes cluster.
In the Options field, provide other Robin cluster resource options configured on your cluster in a
key=valueformat such as https_proxy=192.0.2.0`.Review the details in the Summary pane, agree to the third-party terms and conditions and finally create your cluster.
After installing Robin CNS, verify the installation and set up your cluster.
2.5. Install on OpenShift
Robin CNS can be deployed on OpenShift using any of the methods below:
Using the Robin installer to deploy all necessary objects.
Using the Operator Lifecycle Manager to deploy the operator.
Installing Robin CNS via OperatorHub from the Openshift console.
Note
Throughout this documentation the oc command is equivalent to the kubectl command and is only applicable to the OpenShift environment.
2.5.1. Prerequisites
All general prequisites detailed here must be met.
Kubernetes user(s) who are running either the
kubectloroccommands shown below must have thecluster-adminrole currently assigned to them.The ports detailed here need to be accessible for the installation to succeed and for Robin to operate correctly.
In addition to the above requirements, one needs to create the appropriate Security Context Constraints. These can be created via the CLI. Define the SCC in a JSON or YAML file as shown below:
kind: SecurityContextConstraints
apiVersion: security.openshift.io/v1
metadata:
  name: robin-scc
allowPrivilegedContainer: true
runAsUser:
  type: RunAsAny
seLinuxContext:
  type: RunAsAny
fsGroup:
  type: RunAsAny
supplementalGroups:
  type: RunAsAny
users:
- my-admin-user
groups:
- my-admin-group
$ oc apply -f robin-scc.yaml
2.5.2. Install using the Robin Installer
Follow the steps below to download and install Robin CNS for Openshift on AWS. Please proceed to Step 4 if you have already downloaded the installer.
Visit the following link and register an account.
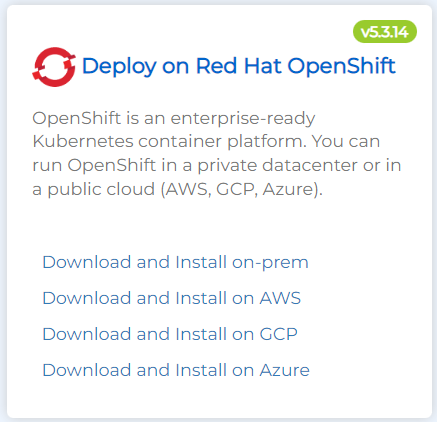
From the Downloads page click Download and Install on AWS on the Deploy on Red Hat OpenShift tab.

Copy either the
wgetorcurlcommand and run it on your command line to download the installation tarfile. An example is shown below:$ wget "http://get.robin.io/download/storage?id=<USERID>&type=openshift-aws" -O robin-install.tar
Once the file is downloaded, run the below command to untar the contents into a new directory.
$ mkdir -p ./robin && tar -xf robin-install.tar -C ./robin
Move into the newly created directory, such that it is now your current working directory, and install Robin via the following commands:
$ cd robin
$ ./install-robin.sh --access-key=<AWS-ACCESS-KEY> --secret-key=<AWS-SECRET-KEY> -y
Validating Kubernetes cluster......Done

Confirm that ports 29442-29470 are open between kubernetes nodes
Make sure the cluster meets prerequisites mentioned at https://docs.robin.io/latest/install.html#minimum-node-requirements
Type yes to confirm that cluster meets the prerequisites:
yes
Validating kubernetes cluster permissions......Done
Validating robin cluster yaml......Done
Installing Robin operator...........Done
Installing Robin cluster............secret/cloud-cred-secret created
Done
Setting up robin client............Done

Activate robin license............Required

       $ robin license activate <USERID>

       Note: You can get your User ID after registering on https://get.robin.io. Above command will only work if the host on which the
             ROBIN client is running on has an internet connection. If this is not the case please retrieve the license key by using the
             below link and apply it using the command 'robin license apply <key>'.

             https://get.robin.io/activate?clusterid=

      For logging into robin cluster,
      Default username: admin
      Default password: Robin123
Note
The above command shows only the required parameters for installations. In order to customize the installation, review the various installation options detailed here.
This concludes the install. Continue here to verify the installation and set up the product.
Follow the steps below to download and install Robin CNS for Openshift on AZURE. Please proceed to Step 4 if you have already downloaded the installer.
Visit the following link and register an account.
From the Downloads page click Download and Install on Azure on the Deploy on RedHat Openshift tab.
Copy either the
wgetorcurlcommand and run it on your command line to download the installation tarfile. An example is shown below:$ wget "http://get.robin.io/download/storage?id=<USERID>&type=openshift-azure" -O robin-install.tar
Once the file is downloaded, run the below command to untar the contents into a new directory.
$ mkdir -p ./robin && tar -xf robin-install.tar -C ./robin
Move into the newly created directory, such that it is now your current working directory, and install Robin via the following commands:
$ cd robin
$ ./install-robin.sh --app-id=XXXXXXXXXXXXXXXXXXXXXXX --tenant-id=XXXXXXXXXXXXXXXXXXXXX --secret-key=XXXXXXXXXXXXXXX  -y

Validating Kubernetes cluster......Done

Confirm that ports 29442-29470 are open between kubernetes nodes
Make sure the cluster meets prerequisites mentioned at https://docs.robin.io/latest/install.html#minimum-node-requirements
Type yes to confirm that cluster meets the prerequisites:
yes
Validating kubernetes cluster permissions......Done
Validating robin cluster yaml......Done
Installing Robin operator...........Done
Installing Robin cluster............secret/cloud-cred-secret created
Done
Setting up robin client............Done

Activate robin license............Required

       $ robin license activate <USERID>

       Note: You can get your User ID after registering on https://get.robin.io. Above command will only work if the host on which the
             ROBIN client is running on has an internet connection. If this is not the case please retrieve the license key by using the
             below link and apply it using the command 'robin license apply <key>'.

             https://get.robin.io/activate?clusterid=

      For logging into robin cluster,
      Default username: admin
Note
The above command shows only the required parameters for installations. In order to customize the installation, review the various installation options detailed here.
This concludes the install. Continue here to verify the installation and set up the product.
Follow the steps below to download and install Robin CNS for Openshift on GCP. Please proceed to Step 4 if you have already downloaded the installer.
Visit the following link and register an account.
From the Downloads page click Download and Install on GCP on the Deploy on RedHat Openshift tab.

Copy either the
wgetorcurlcommand and run it on your command line to download the installation tarfile. An example is shown below:$ wget "http://get.robin.io/download/storage?id=<USERID>&type=openshift-gcp" -O robin-install.tar
Once the file is downloaded, run the below command to untar the contents into a new directory.
$ mkdir -p ./robin && tar -xf robin-install.tar -C ./robin
Move into the newly created directory, such that it is now your current working directory, and install Robin via the following commands:
$ cd robin
$ ./install-robin.sh -y
Validating Kubernetes cluster......Done

Confirm that ports 29442-29470 are open between kubernetes nodes
Make sure the cluster meets prerequisites mentioned at https://docs.robin.io/latest/install.html#minimum-node-requirements
Type yes to confirm that cluster meets the prerequisites:
yes
Validating kubernetes cluster permissions......Done
Validating robin cluster yaml......Done
Installing Robin operator...........Done
Installing Robin cluster............secret/cloud-cred-secret created
Done
Setting up robin client............Done

Activate robin license............Required

       $ robin license activate <USERID>

       Note: You can get your User ID after registering on https://get.robin.io. Above command will only work if the host on which the
             ROBIN client is running on has an internet connection. If this is not the case please retrieve the license key by using the
             below link and apply it using the command 'robin license apply <key>'.

             https://get.robin.io/activate?clusterid=

      For logging into robin cluster,
      Default username: admin
Note
The above command shows only the required parameters for installations. In order to customize the installation, review the various installation options detailed here.
This concludes the install. Continue here to verify the installation and set up the product.
Follow the steps below to download and install Robin CNS for Openshift OnPrem. Please proceed to Step 4 if you have already downloaded the installer.
Visit the following link and register an account.
From the Downloads page click Download and Install on-prem on the Deploy on Red Hat OpenShift tab.

Copy either the
wgetorcurlcommand and run it on your command line to download the installation tarfile. An example is shown below:$ wget "http://get.robin.io/download/storage?id=<USERID>&type=openshift-onprem" -O robin-install.tar
Once the file is downloaded, run the below command to untar the contents into a new directory.
$ mkdir -p ./robin && tar -xf robin-install.tar -C ./robin
Move into the newly created directory, such that it is now your current working directory, and install Robin via the following commands:
$ cd robin
$ ./install-robin.sh -y
Validating Kubernetes cluster......Done

Confirm that ports 29442-29470 are open between kubernetes nodes
Make sure the cluster meets prerequisites mentioned at https://docs.robin.io/latest/install.html#minimum-node-requirements
Type yes to confirm that cluster meets the prerequisites:
yes
Validating kubernetes cluster permissions......Done
Validating robin cluster yaml......Done
Installing Robin operator...........Done
Installing Robin cluster............secret/cloud-cred-secret created
Done
Setting up robin client............Done

Activate robin license............Required

       $ robin license activate <USERID>

       Note: You can get your User ID after registering on https://get.robin.io. Above command will only work if the host on which the
             ROBIN client is running on has an internet connection. If this is not the case please retrieve the license key by using the
             below link and apply it using the command 'robin license apply <key>'.

             https://get.robin.io/activate?clusterid=

      For logging into robin cluster,
      Default username: admin
Note
The above command shows only the required parameters for installations. In order to customize the installation, review the various installation options detailed here.
This concludes the install. Continue here to verify the installation and set up the product.
2.5.3. Verify installation on Openshift
Once the installation is complete, you can get details about robin cluster by running the command:
$ oc get pods -n robinio -o wide
NAME                                     READY   STATUS    RESTARTS   AGE     IP             NODE                                         NOMINATED NODE   READINESS GATES
csi-attacher-robin-64d68c57c4-k6pmv      3/3     Running   0          3d23h   10.131.0.6     ip-10-0-167-211.us-west-1.compute.internal   <none>           <none>
csi-nodeplugin-robin-ftn4n               3/3     Running   0          3d23h   10.0.220.43    ip-10-0-220-43.us-west-1.compute.internal    <none>           <none>
csi-nodeplugin-robin-sf4s6               3/3     Running   0          3d23h   10.0.167.211   ip-10-0-167-211.us-west-1.compute.internal   <none>           <none>
csi-nodeplugin-robin-zz77z               3/3     Running   0          3d23h   10.0.128.218   ip-10-0-128-218.us-west-1.compute.internal   <none>           <none>
csi-provisioner-robin-7847568d5d-qbjqx   3/3     Running   0          3d23h   10.128.2.4     ip-10-0-128-218.us-west-1.compute.internal   <none>           <none>
csi-resizer-robin-7f65965b9-wwg6j        3/3     Running   0          3d23h   10.131.0.10    ip-10-0-167-211.us-west-1.compute.internal   <none>           <none>
csi-snapshotter-robin-0                  3/3     Running   0          3d23h   10.128.2.3     ip-10-0-128-218.us-west-1.compute.internal   <none>           <none>
robin-9hzmp                              1/1     Running   0          3d23h   10.0.220.43    ip-10-0-220-43.us-west-1.compute.internal    <none>           <none>
robin-operator-6944cb8c5-g8q7d           1/1     Running   0          3d23h   10.128.2.10    ip-10-0-128-218.us-west-1.compute.internal   <none>           <none>
robin-vwf96                              1/1     Running   0          3d23h   10.0.167.211   ip-10-0-167-211.us-west-1.compute.internal   <none>           <none>
robin-xx7rz                              1/1     Running   0          3d23h   10.0.128.218   ip-10-0-128-218.us-west-1.compute.internal   <none>           <none>
Run the below command to verify if Robin is successfully installed. For successful installs, the value of the
Phasefield within the status section of the output should beReady.
$ oc describe robincluster -n robinio

Status:
  connect_command:   kubectl exec -it robin-vwf96 -n robinio -- bash
  get_robin_client:  curl -k 'https://10.0.167.211:29442/api/v3/robin_server/download?file=robincli&os=linux' > robin
  master_ip:         10.0.167.211
  Phase:             Ready
  pod_status:
    robin-9hzmp  ip-10-0-220-43.us-west-1.compute.internal  Running 10.0.220.43 false
    robin-vwf96  ip-10-0-167-211.us-west-1.compute.internal  Running 10.0.167.211 false
    robin-xx7rz  ip-10-0-128-218.us-west-1.compute.internal  Running 10.0.128.218 false
  robin_node_status:
    host_name:      ip-10-0-167-211.us-west-1.compute.internal
    join_time:      1600973314
    k8s_node_name:  ip-10-0-167-211.us-west-1.compute.internal
    Roles:          M*,S
    Rpool:          default
    State:          ONLINE
    Status:         Ready
    host_name:      ip-10-0-220-43.us-west-1.compute.internal
    join_time:      1600973337
    k8s_node_name:  ip-10-0-220-43.us-west-1.compute.internal
    Roles:          S,M
    Rpool:          default
    State:          ONLINE
    Status:         Ready
    host_name:      ip-10-0-128-218.us-west-1.compute.internal
    join_time:      1600973339
    k8s_node_name:  ip-10-0-128-218.us-west-1.compute.internal
    Roles:          M,S
    Rpool:          default
    State:          ONLINE
    Status:         Ready
Events:             <none>
You can then use the
connect_commandfrom the status section to connect to the Robin master pod.$ kubectl exec -it robin-vwf96 -n robinio -- bash
Once you are inside the Robin Pod, run the below command to login to Robin CLI.
$ robin login admin
Password:
User admin is logged into Administrators tenant

*****
***** Your ROBIN License is NOT ACTIVATED...
***** Please register at https://get.robin.io/activate
***** to activate your license and access all ROBIN features.
*****
In order to activate your license via the CLI, first register by visiting https://get.robin.io/activate and retrieve your User ID. Next run the following command to activate your licese.
$ robin license activate XXXXXXXX
Run the below command to see all the nodes on which Robin CNS has been installed. Each node should be marked as
ONLINEandReady.$ robin host list Id | Hostname | Version | Status | RPool | LastOpr | Roles | Isol Cores(SHR/DED/Total) | Non-Isol Cores | GPUs | Mem(Free/Alloc/Total) | HDD(#/Alloc/Total) | SSD(#/Alloc/Total) | Pod Usage | Joined Time -------------+--------------------------------------------+-----------+--------+---------+---------+-------+---------------------------+----------------+------+-----------------------+--------------------+--------------------+-----------+---------------------- 1600973281:1 | ip-10-0-167-211.us-west-1.compute.internal | 5.3.2-483 | Ready | default | ONLINE | M*,S | 0/0/0 | 2/20 | 0/0 | 2G/5G/7G | -/-/- | 2/-/400G | 18/250 | 24 Sep 2020 18:48:34 1600973281:2 | ip-10-0-220-43.us-west-1.compute.internal | 5.3.2-483 | Ready | default | ONLINE | S,M | 0/0/0 | 2/20 | 0/0 | 0.22G/7G/7G | -/-/- | 2/-/400G | 28/250 | 24 Sep 2020 18:48:57 1600973281:3 | ip-10-0-128-218.us-west-1.compute.internal | 5.3.2-483 | Ready | default | ONLINE | M,S | 0/0/0 | 3/20 | 0/0 | 1G/6G/7G | -/-/- | 2/-/400G | 19/250 | 24 Sep 2020 18:48:59
That’s it! This concludes the Robin install on Openshift.
Note
Please see the install options detailed below and edit the custom resource section of yaml file appropriately to adjust your deployment.
2.6. Install on Openshift for IBM Cloud Pak for Data
Robin supports integrating IBM Cloud Pak for Data for storage provision. You can use Robin CNS with IBM Cloud Pak for Data version 4.0.
When installing IBM Cloud Pak for Data, you need to install Robin CNS on the Red Hat Openshift platform.
After you install Red Hat Openshift on any supported cloud platform or on-premises, you need to install and configure Robin CNS on it for IBM Cloud Pak for Data to use Robin CNS for storage.
When installing IBM Cloud Pak for Data, you must select custom storage and notify Cloud Pak for Data to use Robin StorageClass. Similarly, when you want to install any application on IBM Cloud Pak for Data and use Robin CNS for storage, you must select custom storage and use the Robin StorageClass.
Procedure
The following are the high-level tasks you should perform for integrating Robin CNS with IBM Cloud Pak for Data.
Note
These high-level tasks include links to the IBM Cloud Pak for Data and Robin CNS documentation.
Install Red Hat Openshift on any supported cloud platform or on-premises. For more information, see Pre-installation tasks - IBM Documentation.
Install Robin CNS on Red Hat Openshift. For more information, see Install on OpenShift.
Verify Robin CNS installation. For more information, see Verify Robin CNS installation on Openshift.
Complete the IBM Cloud Pak for Data pre-installation procedures from Step 3 of IBM Cloud Pak for Data documentation. For more information about pre-installation procedures, see Pre-installation tasks - IBM Documentation.
Create Robin StorageClass. For more information, see Create Robin StorageClass.
As part of IBM Cloud Pak for Data installation, you need to provide storage as a custom StorageClass resource and provide
robin-storage-classfor thestorageClassattribute in the Ibmcpd config file. An example can be found below. For more information and detailed installation steps, see Installing Cloud Pak for Data - IBM Documentation.
Example
apiVersion: cpd.ibm.com/v1
kind: Ibmcpd
metadata:
   name: ibmcpd-cr                                  # This is the recommended name, but you can change it
   namespace: cpd-instance                          # Replace with the project where you will install Cloud Pak for Data
spec:
license:
   accept: true
   license: Enterprise | Standard                   # Specify the Cloud Pak for Data license you purchased
storageClass: robin-storage-class                   # Replace with the Robin RWX
zenCoreMetadbStorageClass: RWO-storage-class        # Replace with the name of a RWO storage class that points to block storage
2.6.1. Create Robin StorageClass
To use Robin CNS for storage for your IBM Cloud Pak for Data, you must create a Robin StorageClass on your Openshift Cluster. Detailed below is a sample definition file for a StorageClass with Robin as the provisioner.
apiVersion: storage.k8s.io/v1
kind: StorageClass
metadata:
   name: robin-storage-class
   labels:
      app.kubernetes.io/instance: robin
      app.kubernetes.io/managed-by: robin.io
      app.kubernetes.io/name: robin
provisioner: robin
reclaimPolicy: Delete
allowVolumeExpansion: true
volumeBindingMode: Immediate
parameters:
   runAsAny: "true"
Note
The StorageClass above can be further customized by specifiying any of the parameters described here.
2.6.2. Use Robin StorageClass for Applications on IBM Cloud Pak for Data
Robin CNS can be used as the storage provider for applications on IBM Cloud Pak for Data. In order to do so, you must select custom storage and use the Robin StorageClass when installing any application on IBM Cloud Pak for Data.
For example, in order to install the Watson Studio application on IBM Cloud Pak and use Robin CNS as custom storage, the previously created Robin StorageClass must be specified using the storageClass attribute in the WS custom resource configuration file as shown below.
Example:
apiVersion: ws.cpd.ibm.com/v1beta1
kind: WS
metadata:
   name: ws-cr                        # This is the recommended name, but you can change it
   namespace: project-name            # Replace with the project where you will install Watson Studio
spec:
license:
   accept: true
   license: Enterprise | Standard     # Specify the license you purchased
version: 4.0.4
storageClass: robin-storage-class     # Use a Robin storageClass
Note
For more information and detailed instructions on how to install Watson Studio, see Installing the Watson Studio service - IBM Documentation.
2.7. Install on AKS
2.7.1. Prerequisites
The following pre-requisites must be met to install Robin CNS on AKS.
The ports detailed here need to be accessible for the installation to succeed and for Robin to operate correctly.
VM scale sets should be disabled on cluster.
Node should have the following operating system installed: Ubuntu (Kernel Version: 4.15.0-1096-azure).
2.7.2. Install using Robin Installer
Follow the steps below to download and install Robin CNS for AKS. Please proceed to Step 4 if you already have the installer downloaded.
Visit the following link and register an account.
From the Downloads page click Download and Install on the AKS tab.
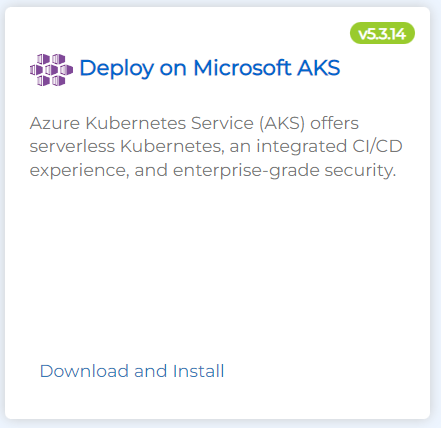
Copy either the
wgetorcurlcommand and run it on your command line to download the installation tarfile. An example is shown below:$ wget "http://get.robin.io/download/storage?id=<USERID>&type=aks" -O robin-install.tar
Once the file is downloaded, run the below command to untar the contents into a new directory.
$ mkdir -p ./robin && tar -xf robin-install.tar -C ./robin
Move into the newly created directory, such that it is now your current working directory, and install Robin via the following commands:
$ cd robin
$ ./install-robin.sh --app-id=XXXXXXXXXXXXXXXXXX --tenant-id=XXXXXXXXXXXXXXXXXXXX --secret-key=XXXXXXXXXXXXXXX -y
Validating Kubernetes cluster......Done

Confirm that ports 29442-29470 are open between kubernetes nodes
Make sure the cluster meets prerequisites mentioned at https://docs.robin.io/latest/install.html#minimum-node-requirements
Type yes to confirm that cluster meets the prerequisites:
yes
Validating kubernetes cluster permissions......Done
Validating robin cluster yaml......Done
Installing Robin operator...........Done
Installing Robin cluster............secret/cloud-cred-secret created
Done
Setting up robin client............Done

Activate robin license............Required

       $ robin license activate <USERID>

       Note: You can get your User ID after registering on https://get.robin.io. Above command will only work if the host on which the
             ROBIN client is running on has an internet connection. If this is not the case please retrieve the license key by using the
             below link and apply it using the command 'robin license apply <key>'.

             https://get.robin.io/activate?clusterid=

      For logging into robin cluster,
      Default username: admin
      Default password: Robin123
Note
The above command shows only the required parameters for installations. In order to customize the installation, review the various installation options detailed here.
This concludes the install. Continue here to verify the installation and set up the product.
2.8. Install on EKS
2.8.1. Prerequisites
The following pre-requisites must be met to install Robin CNS on EKS.
All general prequisites detailed here must be met.
The ports detailed here need to be accessible for the installation to succeed and for Robin to operate correctly.
Nodes should have the following operating systems installed: Ubuntu (Kernel Version: 5.4.0-1024-aws or 5.4.0-1028-aws). The AMI Family to use for this OS is Ubuntu1804.
2.8.2. Install using Robin Installer
Follow the steps below to download and install Robin CNS for EKS. Please proceed to Step 4 if you already have the installer downloaded.
Visit the following link and register an account.
From the Downloads page click Download and Install on the EKS tab.
Copy either the
wgetorcurlcommand and run it on your command line to download the installation tarfile. An example is shown below:$ wget "http://get.robin.io/download/storage?id=<USERID>&type=eks" -O robin-install.tar
Once the file is downloaded, run the below command to untar the contents into a new directory.
$ mkdir -p ./robin && tar -xf robin-install.tar -C ./robin
Move into the newly created directory, such that it is now your current working directory, and install Robin via the following commands:
$ cd robin
$ ./install-robin.sh --secret-key=XXXXXXXXXXXXXXXXXXXXXXXXXXXX  --access-key=XXXXXXXXXXXXXXXXXXXXXXX -y
Validating Kubernetes cluster......Done

Confirm that ports 29442-29470 are open between kubernetes nodes
Make sure the cluster meets prerequisites mentioned at https://docs.robin.io/latest/install.html#minimum-node-requirements
Type yes to confirm that cluster meets the prerequisites:
yes
Validating kubernetes cluster permissions......Done
Validating robin cluster yaml......Done
Installing Robin operator...........Done
Installing Robin cluster............secret/cloud-cred-secret created
Done
Setting up robin client............Done

Activate robin license............Required

       $ robin license activate <USERID>

       Note: You can get your User ID after registering on https://get.robin.io. Above command will only work if the host on which the
             ROBIN client is running on has an internet connection. If this is not the case please retrieve the license key by using the
             below link and apply it using the command 'robin license apply <key>'.

             https://get.robin.io/activate?clusterid=

      For logging into robin cluster,
      Default username: admin
      Default password: Robin123
Note
The above command shows only the required parameters for installations. In order to customize the installation, review the various installation options detailed here.
This concludes the install. Continue here to verify the installation and set up the product.
2.9. Install on RKE
2.9.1. Prerequisites
The following pre-requisites must be met to install Robin CNS on RKE.
All general prequisites detailed here must be met.
The ports detailed here need to be accessible for the installation to succeed and for Robin to operate correctly.
The
kube-controllerpod must be present in order to sign certificates. To achieve this add akube-controllerentry within theservicessection of the Rancher configuration file as shown below.services: etcd: backup_config: enabled: true interval_hours: 12 retention: 6 creation: "12h" extra_args: election-timeout: "5000" heartbeat-interval: "500" retention: "72h" snapshot: false kube-api: always_pull_images: false pod_security_policy: false service_node_port_range: "30000-32767" kube-controller: extra_args: cluster-signing-cert-file: "/etc/kubernetes/ssl/kube-ca.pem" cluster-signing-key-file: "/etc/kubernetes/ssl/kube-ca-key.pem"
2.9.2. Install using Robin Installer
Follow the steps below to download and install Robin CNS for EKS. Please proceed to Step 4 if you already have the installer downloaded.
Visit the following link and register an account.
From the Downloads page click Download and Install on the RKE tab.
Copy either the
wgetorcurlcommand and run it on your command line to download the installation tarfile. An example is shown below:$ wget "http://get.robin.io/download/storage?id=<USERID>&type=rke" -O robin-install.tar
Once the file is downloaded, run the below command to untar the contents into a new directory.
$ mkdir -p ./robin && tar -xf robin-install.tar -C ./robin
Move into the newly created directory, such that it is now your current working directory, and install Robin via the following commands:
$ cd robin
$ ./install-robin.sh -y
Validating Kubernetes cluster......Done

Confirm that ports 29442-29470 are open between kubernetes nodes
Make sure the cluster meets prerequisites mentioned at https://docs.robin.io/latest/install.html#minimum-node-requirements
Type yes to confirm that cluster meets the prerequisites:
yes
Validating kubernetes cluster permissions......Done
Validating robin cluster yaml......Done
Installing Robin operator...........Done
Installing Robin cluster............secret/cloud-cred-secret created
Done
Setting up robin client............Done

Activate robin license............Required

       $ robin license activate <USERID>

       Note: You can get your User ID after registering on https://get.robin.io. Above command will only work if the host on which the
             ROBIN client is running on has an internet connection. If this is not the case please retrieve the license key by using the
             below link and apply it using the command 'robin license apply <key>'.

             https://get.robin.io/activate?clusterid=

      For logging into robin cluster,
      Default username: admin
      Default password: Robin123
Note
The above command shows only the required parameters for installations. In order to customize the installation, review the various installation options detailed here.
This concludes the install. Continue here to verify the installation and set up the product.
2.10. Install with HashiCorp Vault using Robin Installer
Robin Cloud Native Storage (CNS) supports the integration of HashiCorp Vault as a key management service (KMS). Vault is a tool for securely accessing secrets. This includes but is not limited to API keys, passwords, and certificates. Vault provides a unified interface to any secret, while providing tight access control and recording a detailed audit log. More information on the product can be found here.
2.10.1. Prerequisites
The following prerequisites must be met to install Robin CNS with HashiCorp Vault integration on any given Kuberentes distribution.
All prerequisites that apply to general installations on the chosen Kubernetes distribution, must be met.
A Vault Server must be pre-installed and functioning correctly.
The IP address of the Vault Server must be reachable from the Kubernetes node on which the Robin CNS installation will take place.
Signed x509 CA Certificates for the Vault Server and Vault Client must be present on the Kubernetes node where the Robin CNS installation will be initiated.
The key for the Vault Client CA Certificate must be present on the Kubernetes node where the Robin CNS installation will be initiated.
A Robin CNS folder, in which the master key will be placed, must be present on the Vault Server.
The
disable_mlockattribute must be set totruein thevault.configfile.
Note
HashiCorp Vault can only be integrated as part of the initial Robin CNS installation, it is not possible to configure it post-deployment.
2.10.2. How the Integration works
As part of the initial Robin CNS installation a one-time Kubernetes Job is spawned that sends an API request (using the given Vault parameters) to the Vault Server in order to create a key that is stored within the Vault Server database. Following this, the robin-kms init container fetches this key and encodes it in order to create the Robin CNS master key. This is then stored in-memory within the Robin CNS master Pod. When a PersistentVolume is provisioned on the Robin CNS cluster, a volume key is generated based on this master key in order to encrypt the aforementioned PV, and is stored within the Robin CNS database.
Some points to consider with regards to Vault integration include:
Either certificates or keys can be used to complete the integration
Integration with existing CNS clusters is not supported.
The in-memory master key will be deleted when the Robin CNS master Pod is deleted.
2.10.3. Necessary Parameters
The below parameters must be passed to the installation script in order to integrate Robin CNS with HashiCorp Vault:
vault-addr- URL at which to contact the Vault server consisting of its IP Address and the port number at which it can be reached.vault-keys-path- The path to the folder at which the key for Robin CNS will be stored in the Vault Server.vault-ca-cert- The path to the Vault Server CA certificate.vault-client-cert- The path to the Vault Client CA certificate.vault-client-key- The path to the Vault Client key.
2.10.4. Installation Steps
The following are the steps to download and install Robin CNS with HashiCorp Vault integration on IKS. Proceed to step 4 if you have already downloaded the Robin Installer.
Visit the following link and register an account.
On the Downloads page, click Download and Install on the tab representing the desired Kubernetes distribution. In the example below the IKS tab has been chosen.
Copy either the
wgetorcurlcommand and run it on your command line to download the installation tar file. An example is shown below:$ wget "http://get.robin.io/download/storage?id=<USERID>&type=iks" -O robin-install.tar
Note
In the above example, the tar file for IKS installations is downloaded however the
typeparameter must be changed to the respective distribution as needed.Once the file is downloaded, run the below command to untar the contents into a new directory.
$ mkdir -p ./robin && tar -xf robin-install.tar -C ./robin
Move into the newly created directory, such that it is now your current working directory, and run the following commands to install Robin with Vault integration:
# cd robin
# ./install-robin.sh --version=5.3.6-89 --vault-addr=https://172.0.10.16:8080 --vault-keys-path=secret/robin --vault-ca-cert=./certs/vault-ca.crt --vault-client-cert=./certs/vault-client.crt --vault-client-key=./vault-client.pem

  Validating Kubernetes cluster......Done
  Validating kubernetes cluster permissions......Done
  Validating robin cluster yaml......Done
  Installing Robin operator...........Done
  Installing Robin cluster............Done
  Setting up robin client............Done

  Activate robin license............Required


  *****
  ***** Your ROBIN License is NOT ACTIVATED...
  ***** Please register at https://get.robin.io/activate
  ***** to activate your license and access all ROBIN features.
  *****

        $ robin license activate <USERID>

        Note: You can get your User ID after registering on https://get.robin.io. Above command will only work if the host on which the
              ROBIN client is running on has an internet connection. If this is not the case please retrieve the license key by using the
              below link and apply it using the command 'robin license apply <key>'.

              https://get.robin.io/activate?clusterid=XXXXXXXXXXXXXXXXXXXXXXXXXXXXXX.XXXXXXX.XXXXXXXXXXXXXXX.XX

        For logging into robin cluster,
        Default username: admin
        Default password: Robin123
  You can access Robin UI at https://5ecbfXXX-eu-de.lb.appdomain.cloud:29443
Note
The above command shows only the required parameters for installations. In order to customize the installation, review the various installation options detailed here.
This concludes the install. Continue here to verify the installation and set up the product.
2.11. Install with Google KMS using Robin Installer
Robin Cloud Native Storage (CNS) supports the integration of Google Cloud Key Management as a key management service (KMS). Googke Cloud KMS is a product that allows for fast and centralized key management in Google Cloud. It enables the storage of API keys, passwords, certificates and encryption of Kuberenetes secrets at the application layer on GKE and Google Anthos. More information on the product can be found here.
2.11.1. Prerequisites
All general prequisites detailed here must be met.
Access to a Kubernetes cluster running a supported version of GKE or Google Anthos must be available.
All prerequisites for the base Kuberentes distribution must be met. For GKE clusters this is available here, whilst for Anthos cluster this is available here.
A JSON file containing the Service Account key for the appropriate Service Account on Google Cloud is needed. To create and download the Service account key, follow the steps available here.
The keyring name of the respective KMS must be known.
Note
Google KMS can only be integrated as part of the initial Robin CNS installation using the Robin installer, it is not possible to configure it post-deployment.
2.11.2. Necessary Parameters
The below parameters must be passed to the installation script in order to integrate Robin CNS with Google KMS:
kms-keyring- The name of the keyring associated with the desired KMS.gcp-key-file- The fully qualified pathnamee of the JSON file containing the Service account key to use.
2.11.3. Installation Steps
Complete the following steps to download and install Robin CNS on Google Anthos or GKE and integrate Google KMS. Proceed to Step 5 if you already have the installer downloaded.
Access the get.robin.io site and register an account.
You will receive an email to the provided mail ID with a link to access the get.robin.io site. Use the link to access it.
From the Downloads page click Download and Install on either the GKE or Anthos tabs depending on your chosen distribution.
Copy either the
wgetorcurlcommand and run it on your command line to download the installation tar file. An example is shown below:$ wget "http://get.robin.io/download/storage?id=<USERID>&type=gke" -O robin-install.tar
Once the file is downloaded, run the following command to untar the contents into a new directory.
$ mkdir -p ./robin && tar -xf robin-install.tar -C ./robin
Move into the newly created directory, such that it is now your current working directory, and install Robin via the following commands:
$ cd robin
$ ./install-robin.sh  --zone-name=us-central1=us-central1 --cluster-name=test-cluster-1  --kms-keyring=TESTKR --gcp-key-file=/home/kms/5314183/rock-range-2076xxxx3193a74e.json
Validating Kubernetes cluster......Done

Confirm that ports 29442-29470 are open between kubernetes nodes
Make sure the cluster meets prerequisites mentioned at https://docs.robin.io/latest/install.html#minimum-node-requirements
Type yes to confirm that cluster meets the prerequisites:
yes
Validating kubernetes cluster permissions......Done
Validating robin cluster yaml......Done
Installing Robin operator...........Done
Installing Robin cluster............secret/cloud-cred-secret created
Done
Setting up robin client............Done

Activate robin license............Required

      $ robin license activate <USERID>

      Note: You can get your User ID after registering on https://get.robin.io. Above command will only work if the host on which the
            ROBIN client is running on has an internet connection. If this is not the case please retrieve the license key by using the
            below link and apply it using the command 'robin license apply <key>'.

            https://get.robin.io/activate?clusterid=

      For logging into robin cluster,
      Default username: admin
      Default password: Robin123
This concludes the install. Continue here to verify the installation and set up the product.
2.12. Install with IBM Key Protect using Robin Installer
Robin Cloud Native Storage (CNS) supports the integration of IBM Key Protect as a key management service (KMS). The IBM Key Protect is a cloud-based, encryption KMS that allows data to be secured and stored in IBM Cloud using the latest envelope encryption techniques. For more information, see integration with IBM Key Protect.
2.12.1. Prerequisites
The following prerequisites must be met to install Robin CNS with IBM Key Protect integration on IKS.
All prerequisites that apply to general installations on IKS, detailed here, must be met.
An IBM Key Protect service instance must be created in IBM Cloud prior to installation. Note this might require a user with special permissions.
The correct KMS endpoint URL is known, as per the region in which the IBM Key Protect service instance is located, and is reachable from the Kubernetes node from which the installation will be initiated. If installing on an air-gapped cluster a private KMS endpoint URL must be used.
An API Key for the associated IBM Cloud account is generated.
Note
IBM Key Protect can only be integrated as part of the initial Robin CNS installation, it is not possible to configure it post-deployment.
2.12.2. Necessary Parameters
The below parameters must be passed to the installation script in order to integrate Robin CNS with IBM Key Protect:
ibmprotect-instance-id- The UUID associated with the precreated IBM Key Protect Service instance.kms-endpoint- The URL representing KMS endpoint for the region in which the IBM Key Protect service instance is located. A private endpoint can be used when installing on air-gapped clusters.api-key- The API key associated with the owner of the IBM Key Protect Service instance. This will be used to generate a token for authentication purposes with the provided KMS endpoint.
2.12.3. How the Integration works
As part of the initial Robin CNS installation a one-time Kubernetes Job is spawned that sends an API request (using the given IBM Key Protect parameters) to the precreated IBM Key Protect Service in order to create a root-key object. This object is stored in the Service’s online database. Following this, the robin-kms init container fetches the payload associated with the root-key object and encodes it in order to create the Robin CNS master key. This is then stored in-memory within the Robin CNS master Pod. When a PersistentVolume is provisioned on the Robin CNS cluster, a volume key is generated based on this master key in order to encrypt the aforementioned PV, and is stored within the Robin CNS database.
Some points to consider with regards to IBM Key Protect integration include:
Robin does not support IBM Key Protect integration with existing CNS clusters.
The in-memory master key will be deleted when the Robin CNS master Pod is deleted.
IBM Key Protect can be integrated with air-gapped Kubernetes clusters via a private KMS endpoint.
2.12.4. Installation Steps
The following are the steps to download and install Robin CNS with IBM Key Protect integration on IKS. Proceed to step 4 if you have already downloaded the Robin Installer.
Visit the following link and register an account.
On the Downloads page, click Download and Install on the IKS tab.
Copy either the
wgetorcurlcommand and run it on your command line to download the installation tar file. An example is shown below:$ wget "http://get.robin.io/download/storage?id=<USERID>&type=iks" -O robin-install.tar
Once the file is downloaded, run the below command to untar the contents into a new directory.
$ mkdir -p ./robin && tar -xf robin-install.tar -C ./robin
Move into the newly created directory, such that it is now your current working directory, and run the following commands to install Robin with IBM Key protect integration:
# cd robin
# ./install-robin.sh --ibmprotect-instance-id=XXXXXXXX-XXXX-XXXX-XXXX-XXXXXXXXXXX --kms-endpoint=https://eu-de.kms.cloud.ibm.com --api-key=XXXXXXXXXXXXXXXXXXXXXXXXXX-XXXXXXXXXXXXX

  Validating Kubernetes cluster......Done
  Validating kubernetes cluster permissions......Done
  Validating robin cluster yaml......Done
  Installing Robin operator...........Done
  Installing Robin cluster............Done
  Setting up robin client............Done

  Activate robin license............Required


  *****
  ***** Your ROBIN License is NOT ACTIVATED...
  ***** Please register at https://get.robin.io/activate
  ***** to activate your license and access all ROBIN features.
  *****

        $ robin license activate <USERID>

        Note: You can get your User ID after registering on https://get.robin.io. Above command will only work if the host on which the
              ROBIN client is running on has an internet connection. If this is not the case please retrieve the license key by using the
              below link and apply it using the command 'robin license apply <key>'.

              https://get.robin.io/activate?clusterid=XXXXXXXXXXXXXXXXXXXXXXXXXXXXXX.XXXXXXX.XXXXXXXXXXXXXXX.XX

        For logging into robin cluster,
        Default username: admin
        Default password: Robin123
  You can access Robin UI at https://5ecbfXXX-eu-de.lb.appdomain.cloud:29443
Note
The above command shows only the required parameters for installations. In order to customize the installation, review the various installation options detailed here.
This concludes the install. Continue here to verify the installation and set up the product.
2.13. Install on Open-source Kubernetes
You can install Robin Cloud Native Storage (CNS) on Open-source Kubernetes deployed on on-premises setups.
2.13.1. Prerequisites
The following prerequisites must be met to install Robin CNS on Open-source Kubernetes.
All general prerequisites detailed here must be met.
2.13.2. Install using Robin Installer
The following are the steps to download and install Robin CNS on Open-source Kubernetes. Proceed to step 4 if you have already downloaded the Robin Installer.
Visit the following link and register an account.
On the Downloads page, click Download and Install on the IKS tab.
Copy either the
wgetorcurlcommand and run it on your command line to download the installation tar file. An example is shown below:$ wget "http://get.robin.io/download/storage?id=<USERID>&type=opensource" -O robin-install.tar
Once the file is downloaded, run the below command to untar the contents into a new directory.
$ mkdir -p ./robin && tar -xf robin-install.tar -C ./robin
Move into the newly created directory, such that it is now your current working directory, and run the following commands to install Robin CNS:
$ ./install-robin.sh --version=5.3.14-212
Validating Kubernetes cluster......Done
Make sure the cluster meets prerequisites mentioned at https://docs.robin.io/storage/latest/install.html#prerequisites
Type yes to confirm that cluster meets the prerequisites: yes
Validating kubernetes cluster permissions......Done
Validating robin cluster yaml......Done
Installing Robin operator...........Done
Installing Robin monitor...........Done
Installing Robin cluster............Done
Setting up robin client............Done

Activate robin license............Required

*****
***** Your ROBIN License is NOT ACTIVATED…
***** Please register at https://get.robin.io/activate
***** to activate your license and access all ROBIN features.
*****

        $ robin license activate <USERID>

        Note: You can get your User ID after registering on https://get.robin.io. Above command will only work if the host on which the
              ROBIN client is running on has an internet connection. If this is not the case please retrieve the license key by using the
              below link and apply it using the command 'robin license apply <key>'.

              https://get.robin.io/activate?clusterid=

      For logging into robin cluster,
      Default username: admin
      Default password: Robin123
You can access Robin UI at https://192.0.2.180:29443
Note
The above command shows only the required parameters for installations. In order to customize the installation, review the various installation options detailed here.
After installing Robin CNS, verify the installation and set up your cluster.
2.14. Install on an air-gapped Cluster
An air-gapped Kubernetes cluster is a cluster that is behind a firewall without access to the Internet. You can install Robin on an air-gapped cluster by following the instructions provided in this topic.
2.14.1. Prerequisites
All general prequisites detailed here must be met.
A driver node with Docker and the
kubectlclient installed.The aforementioned driver node should also have access to the Internet for downloading the following: container images required to install Robin, Robin installation script, and Robin deployment YAML files.
A Kubernetes or OpenShift cluster already deployed on your choice of infrastructure.
A container registry with sufficient space for the Robin image and other images.
2.14.2. Installation Steps
From the designated driver node, download the following Docker images:
Use the suggested
docker pullcommands to download each image respectively. An example is shown below:$ docker pull robinsys/robinimg:5.3.6-167s
From the same driver node, download the following CSI images:
k8s.gcr.io/sig-storage/snapshot-controller:v3.0.3k8s.gcr.io/sig-storage/csi-snapshotter:v3.0.3k8s.gcr.io/sig-storage/csi-resizer:v1.1.0k8s.gcr.io/sig-storage/csi-provisioner:v2.2.0k8s.gcr.io/sig-storage/csi-attacher:v3.2.0k8s.gcr.io/sig-storage/csi-node-driver-registrar:v2.1.0quay.io/k8scsi/livenessprobe:v2.2.0k8s.gcr.io/coredns/coredns:v1.8.0
Use the
docker pullcommand to download each image respectively. An example is shown below:$ docker pull k8s.gcr.io/sig-storage/snapshot-controller:v3.0.3
Note
All the above images must be downloaded. They each have been listed with the repository name and image version tag included.
Next push the Robin and CSI images from the driver node to a cloud container registry which is accessible by all nodes within the target Kubernetes cluster. The
docker pushcommand can be used to achieve this as shown in the example below.$ docker push artifactory.robinsystems.com/docker/robinsys/robinimg:5.3.6-167 $ docker push artifactory.robinsystems.com/docker/k8s.gcr.io/sig-storage/csi-attacher:v3.2.0
Note
Be sure to include the registry path, image name and version tag when pushing the images to cloud container registry. In the example above the registry is at
artifactory.robinsystems.comAccess one of the nodes within the Kubernetes cluster that has access to the previously utilized container registry and create the
robinionamespace as shown below:$ kubectl create ns robinio
Note
A namespace with the name
robinioexactly must be created.(Optional) If your cloud registry is only accessible using login credentials, then a secret needs to be created in the
robinionamespace with the appropriate credentials as shown below:$ kubectl create secret docker-registry regcred --docker-server=artifactory.robinsystems.com --docker-username=<username> --docker-password=<password> -n robinio --docker-email=a@a.com
Note
The steps to create secret might differ depending on the cloud platform that is being utilized.
(Optional) If there already exists a secret that can be used to access cloud container registry in which all the necessary images are stored, copy it to the
robinionamespace using the given commands:$ kubectl get secret <secret_name> --export -o yaml > <filename> $ kubectl create -f <filename> -n robinio
From the driver node with
kubectlinstalled, access get.robin.io and follow the on-screen instructions to download therobin-install.tarfile for the desired Robin version. Ensure the tarfile downloads successfully onto your driver node.Copy the preciously download installation tarfile onto a node within your Kubernetes cluster. Next, create a new directory and extract the contents of the tar into it via the following command:
$ mkdir -p ./robin && tar -xf robin-install.tar -C ./robin
Move into the newly created directory, such that it is now your current working directory, and install Robin via the following commands:
$ cd ./robin
$ ./install-robin.sh --version=5.3.4-75 --image-registry-path=us.icr.io/robin-5-3-4 -y --version=5.3.4-75 --image-pull-secret=all-icr-io
Validating Kubernetes cluster......Done
Validating kubernetes cluster permissions......Done
Validating robin cluster yaml......Done
Installing Robin operator...........Done
Installing Robin cluster............Done
Setting up robin client............Done

Activate robin license............Required

       $ robin license activate <USERID>

       Note: You can get your User ID after registering on https://get.robin.io. Above command will only work if the host on which the
             ROBIN client is running on has an internet connection. If this is not the case please retrieve the license key by using the
             below link and apply it using the command 'robin license apply <key>'.

             https://get.robin.io/activate?clusterid=

      For logging into robin cluster,
      Default username: admin
      Default password: Robin123
Note
The command used in the final step of this process can have the options associated with specific environment type appended to it if needed. This is particularly the case when integrating with an external KMS.
2.14.3. Verify Robin Installation on an air-gapped cluster
Check if the pods created in the robinio namespace are in a running state by issuing the following command:
$ root@vpc-secure-bastion-vsi:~# kubectl get pods -n robinio

NAME                                   READY   STATUS    RESTARTS   AGE
csi-attacher-robin-8c89f9dc7-cmbx8     3/3     Running   0          6h54m
csi-nodeplugin-robin-f26fz             3/3     Running   0          6h54m
csi-nodeplugin-robin-pd42l             3/3     Running   0          6h54m
csi-nodeplugin-robin-xsq78             3/3     Running   6          6h54m
csi-provisioner-robin-849cf465f4-xqhbc 3/3     Running   0          6h54m
csi-resizer-robin-587d4449bd-xsfbp     3/3     Running   3          6h54m
csi-snapshotter-robin-0                3/3     Running   0          6h54m
robin-57w8h                            1/1     Running   0          6h54m
robin-drdzx                            1/1     Running   2          6h54m
robin-nfbxx                            1/1     Running   0          6h54m
robin-nfs-shared-2                     2/2     Running   0          159m
robin-nfs-shared-3                     2/2     Running   0          149m
robin-operator-64b6f564f4-mgnr4        1/1     Running   0          6h54m
Additional verification steps alongside the one above can be found here.
2.15. Install Options
Shown below is a Robin CNS deployment YAML file wherein which all the configurable options are present.
apiVersion: manage.robin.io/v1
kind: RobinCluster
metadata:
  name: robin
  namespace: robinio
spec:
  image_version: <docker-image-name-version>
  k8s_provider: gke|openshift|eks|aks|pks|rke|robin|upstream
  host_type: gcp|physical|aws|azure
  node_selector: <node selector>
  source: <operatorhub|gcpmarketplace>
  # storage_disks: "count:1,type:pd-ssd,size:200"
  # kms: robin/google
  # kms_keyring: <keyring_name>
  # options:
  #   cloud_cred_secret: aws-secret
  #   requests:
  #     cpu: "2"
  #     memory: "2Gi"
  #   limits:
  #     cpu: "2"
  #     memory: "2Gi"
Each option shown above is described below alongside whether or not they must to be present in the YAML file.
Note
Each option shown above also has an equivalent parameter in the Robin installer that allows it to be specified on the command line.
|
Required |
Image name/version in your docker registry |
|
Required |
Kubernetes Distribution name. The following values are
supported: |
|
Required |
The type of host on which the Kubernetes distribution
is running. The following values are supported: |
|
Optional |
Specify a selector to pick the nodes on which Robin CNS should be installed. For OpenShift v3 specify “node-role.kubernetes.io/compute=true” or for OpenShift v4 specify “node-role.kubernetes.io/master=’’” |
|
Optional |
If disks need to be provisioned as part of the installation, a string containing the count, type and size (in GB) of each disk can be specified. Valid disk types for GCP based machines include: pd-ssd and pd-standard. Valid disk types for AWS based machines include: gp2, gp3, io1, io2 and st1. Valid disk types for Azure include: premium and standard. |
|
Optional |
If external key management needs to be provided. Valid values include: |
|
Optional |
Keyring name if google KMS is selected |
|
Optional |
Source of deployment yaml. Only specify this value if Robin CNS is deployed through one of the following portals: |
|
Required |
Name of secret containing cloud specific credentials. This is required for Azure and IBM, optional for AWS if EC2 instances are configured with the necessary IAM roles and optional for GCP deployments. |
|
Optional |
Request resource for Robin pods |
|
Optional |
Set resource limits for Robin pods |
2.16. Verify Installation
Once the installation is complete, verify the Robin cluster state and status by referring to the robincluster custom resource as shown below. After a successful installation, the state and status of each node within the cluster should be ONLINE and Ready respectively.
$ kubectl describe robinclusters -n robinio
Name:         robin
Namespace:    robinio
Labels:       app.kubernetes.io/instance=robin
              app.kubernetes.io/managed-by=robin.io
              app.kubernetes.io/name=robin
Annotations:  API Version:  manage.robin.io/v1
Kind:         RobinCluster
Metadata:
   Creation Timestamp:  2021-02-04T09:41:06Z
   Generation:          1
Resource Version:  378697
Self Link:         /apis/manage.robin.io/v1/namespaces/robinio/robinclusters/robin
UID:               7533d2da-8521-47e2-bb52-426df5a07a2b
Spec:
 host_type:            ibm
 image_pull_secret:    all-icr-io
 image_registry_path:  uk.icr.io/docker_registry/docker
 image_robin:          robinsys/robinimg:5.3.4-75
 k8s_provider:         iks
Options:
 cloud_cred_secret:  cloud-cred-secret
 update_coredns:     1
Status:
 connect_command:   kubectl exec -it robin-nfbxx -n robinio -- bash
 get_robin_client:  curl -k https://10.242.64.22:29442/api/v3/robin_server/download?file=robincli&os=linux > robin
 master_ip:         10.242.64.22
 Phase:             Ready
 pod_status:
  robin-nfbxx  10.242.64.22  Running  10.242.64.22
  robin-drdzx  10.242.64.21  Running  10.242.64.21
  robin-57w8h  10.242.64.20  Running  10.242.64.20
robin_node_status:
 host_name:      kube-c0d69ael0c0ce2a8b6b0-asitclus-default-00000b25
  join_time:      1612431722
  k8s_node_name:  10.242.64.22
  Roles:          M*,S
  Rpool:          default
  State:          ONLINE
  Status:         Ready
 host_name:      kube-c0d69ael0c0ce2a8b6b0-asitclus-default-00000a68
  join_time:      1612431745
  k8s_node_name:  10.242.64.20
  Roles:          S,M
  Rpool:          default
  State:          ONLINE
  Status:         Ready
 host_name:      kube-c0d69ael0c0ce2a8b6b0-asitclus-default-00000c21
  join_time:      1612431760
  k8s_node_name:  10.242.64.21
  Roles:          S,M
  Rpool:          default
  State:          ONLINE
  Status:         Ready
  Events:         <none>
Note
If you have deployed Robin in a different namespace, then specify it instead of robinio in the above command.
Use the “Connect Command” value from the above output to connect to Robin pod. For example,
$ kubectl exec -it robin-rnnnd -n robinio bash
After logging into Robin container you can login as “admin” user with the default password of ‘Robin123’ and run Robin commands as shown below:
$ robin login admin --password Robin123
$ robin host list
In addition if a key management service (KMS) was specified as part of the installation run the below command to verify it is registered with Robin.
# robin config list cluster kms
  Section | Attribute | Value
  --------+-----------+------------
  cluster | kms       | ibmprotect
Lastly in order to ensure the Robin storage class is available and can be used for provisioning, issue the following command.
$ kubectl get sc
2.17. ROBIN License Activation
After installing ROBIN software on any platform, a notice will appear stating that the ROBIN license will expire in approximately two days whenever a command is run. This is an indication that the license is yet to be activated. In order to avoid a cluster lockdown you can activate your ROBIN cluster via one of the following methods.
If the license is not activated your ROBIN cluster will be locked after the allocated time.
2.17.1. Web License Activation
Activate your ROBIN license by clicking here. After following the instructions detailed on the website your ROBIN license should be activated and your cluster ready to use.
Note
You will be asked to provide the Robin CNS cluster id when activating your license. This can be discovered by running the robin license id command via the client or when you are connected to the Robin pod. In addition you can apply the generated key via the command robin license apply <key>
2.18. High Availability of ROBIN Services
Robin CNS manages High Availability of all management services that are deployed as part of Robin CNS installation. Robin CNS pods are deployed as part of a daemonset. Some pods are designated to run master services. Robin CNS configures 3 of these pods as manager pods which can host these master services.
If one of the kubernetes node goes down, ROBIN seamlessly starts master services on other manager pods.
If pod hosting ROBIN master services is removed from kuberenetes cluster, ROBIN will automatically designate another pod as manager pod so that it always has 3 master pods.
2.19. Uninstalling ROBIN
2.19.1. Deleting objects created via the Robin installer
If the Robin CNS operator was deployed on an existing Kubernetes cluster via the Robin installer in the steps described previously, one can run the following command to uninstall:
$ ./install-robin.sh --uninstall
Uninstalling Robin cluster......Done
Some Robin managed namespaces (t001-u000001 t001-u000002 t001-u000003 ) are not deleted, please run following command to delete those after
making sure there are no required kubernetes objects present in these namespaces
"kubectl delete ns -l robin.io/domain=ROBIN"
Note
The install-robin.sh script is shipped within the downloadable tarfile.
2.19.2. Deleting objects created via Kubernetes
2.19.2.1. Cleanup for automated installations
For uninstalling Robin CNS from Kubernetes cluster via kubectl, run the following commands:
$ kubectl delete -f robin.yaml
$ kubectl delete clusterrolebinding -l robin.io/domain=ROBIN
$ kubectl delete rolebinding -l robin.io/domain=ROBIN -A
Run the below command to get a list of namespaces created with Robin and delete the namespaces one by one. Please make sure you are not accidentally deleting namespaces that contain non-robin applications.
$ kubectl get ns -l robin.io/domain=ROBIN
After reviewing the list, if you want to delete all the namespaces at once, you can run
$ kubectl delete ns -l robin.io/domain=ROBIN
2.19.2.2. Cleanup for manual installations
Note
The below instructions for cleanup only apply to Anthos/GKE clusters where Robin CNS was setup using the commands detailed here and NOT via the Robin installer.
In order to uninstall Robin CNS from a Anthos/GKE Kubernetes cluster via kubectl, run the following commands:
$ export APP_INSTANCE_NAME=robin
$ export NAMESPACE=robinio

$ kubectl delete -f ${APP_INSTANCE_NAME}_manifest.yaml --namespace "${NAMESPACE}"
$ kubectl delete serviceaccount "${APP_INSTANCE_NAME}-deployer-sa" -n "${NAMESPACE}"
$ kubectl delete clusterrolebinding "$APP_INSTANCE_NAME:$NAMESPACE:deployer-crb0"
$ kubectl delete clusterrole "$APP_INSTANCE_NAME:$NAMESPACE:deployer-cr0"
$ kubectl delete application,deployment --namespace ${NAMESPACE} --selector app.kubernetes.io/name=$APP_INSTANCE_NAME
$ kubectl delete -f license.yaml -n ${NAMESPACE}
$ kubectl delete ns robinio
2.19.3. Deleting objects created by OLM
If the ROBIN operator was deployed on an OpenShift cluster via the OLM method described above, run the following command to delete all the objects created within the robinio namespace:
$ oc delete namespace robinio
Note
The commands starting with oc are applicable for the OpenShift environment.
2.19.4. Deleting objects created via GCP UI
Note
The below instructions for cleanup only apply to GKE clusters where Robin CNS was setup using the steps detailed here.
In order to uninstall Robin CNS from a GKE Kubernetes cluster via the Google Cloud Platform UI navigate to the Application details page, select the instance of Robin CNS to be deleted, and click the delete action at the top of the screen. You should see a screen similar to the one below.
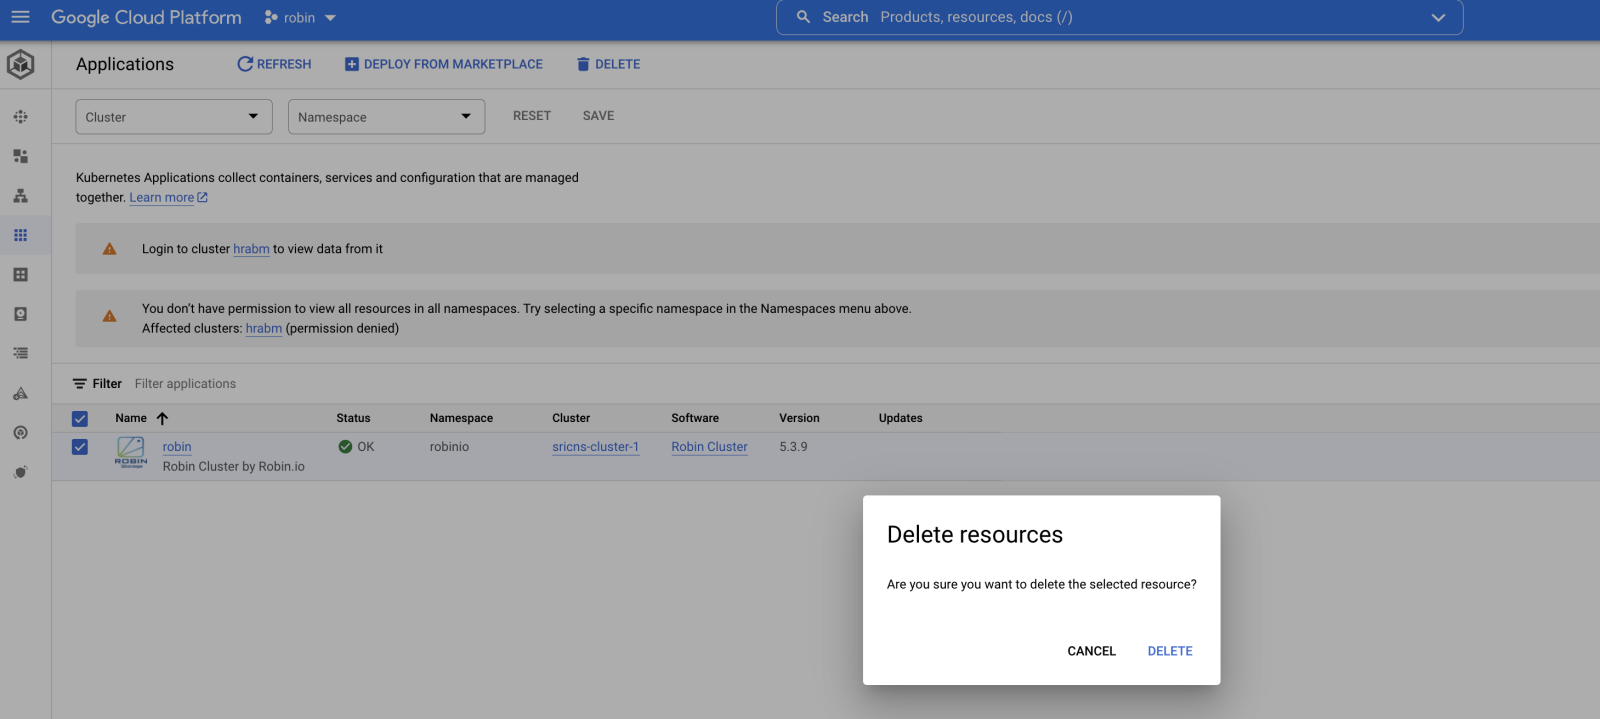
After confirming the deletion of the application, run the following command on the GKE cluster:
$ export APP_INSTANCE_NAME=robin
$ kubectl delete robincluster ${APP_INSTANCE_NAME}